According to UIDAI (2026), over 1.4 billion Aadhaar numbers have been successfully issued across India, firmly establishing it as a foundational digital identity for residents. This widespread adoption underscores Aadhaar’s critical role in accessing a multitude of government services and financial transactions nationwide.
For residents of Bangalore, understanding how to navigate Aadhaar Card Enrollment Centres for new registrations and crucial updates is essential. This article provides a comprehensive guide, detailing centre locations, required documents, the step-by-step process, and vital considerations to ensure your Aadhaar details remain accurate and current.
Table of Contents
Understanding Aadhaar Enrollment and Updates in Bangalore
The Aadhaar card is a crucial identification document issued by the Unique Identification Authority of India (UIDAI), containing a unique 12-digit number and personal information. It serves as proof of identity and address for various government and non-government services in 2026. This universal ID simplifies processes for citizens, enabling easier access to public welfare schemes and financial instruments.
Regular updates to your Aadhaar details are essential to maintain its accuracy and validity for banking, taxation, and government benefit schemes. Incorrect or outdated information can lead to complications, such as service denials or delays in receiving crucial benefits. Keeping your information current ensures that your digital identity remains robust and functional.
Aadhaar Enrollment Centres in Bangalore offer a comprehensive range of services beyond just new enrollments. These centres are equipped to handle various demographic and biometric updates, ensuring your information is always current. They act as vital touchpoints for citizens to manage their Aadhaar records effectively.
Quick Context: Aadhaar’s Role in 2026
Aadhaar is mandated for linking with PAN cards for income tax filing, accessing most government subsidies, and for KYC verification across all regulated financial institutions in India. Its importance continues to grow for digital transactions.
Key Services Available at Aadhaar Centres
Visiting an authorised Aadhaar enrollment centre provides access to several important services. These facilities are designed to support residents in managing their Aadhaar information efficiently and securely. You can perform various actions to keep your details current.
- New Aadhaar enrollment for residents of all ages, including infants.
- Demographic updates such as name, address, date of birth, gender, mobile number, and email.
- Biometric updates, including fingerprints, iris scans, and facial photographs.
- Aadhaar download and print services if you have lost your physical card.
- Checking Aadhaar enrollment status using your Enrollment ID (EID).
Why Regular Aadhaar Updates Are Essential
Keeping your Aadhaar details updated is not merely a formality; it is a critical step for seamless participation in India’s digital economy and public services. An updated Aadhaar ensures you can access benefits without interruption. Parvathi, a civil servant in Bhubaneswar, relies on her updated Aadhaar for salary disbursements and provident fund access.
For instance, your bank account may be linked to your Aadhaar, requiring matching details for KYC compliance. Similarly, government subsidies and welfare schemes often rely on accurate Aadhaar information for direct benefit transfers, making timely updates indispensable. Any mismatch can cause significant inconvenience and delay.
Finding Your Nearest Aadhaar Card Enrollment Centre in Bangalore
Locating an official Aadhaar enrollment centre in Bangalore is a straightforward process, primarily managed through the UIDAI’s online portal. It is important to use only official channels to ensure you visit an authorised facility, avoiding any potential fraud or misinformation. The UIDAI website is the most reliable source for this information.
The UIDAI website offers a dedicated tool to help you find centres based on your location preferences. This ensures you can identify the most convenient and legitimate centre for your enrollment or update needs. Always cross-reference addresses with known official locations to confirm authenticity.
Pro Tip: Verify Centre Authenticity
Always check the UIDAI website (uidai.gov.in) for the latest list of authorised Aadhaar enrollment centres. Avoid third-party websites or agents claiming to offer Aadhaar services, as these may not be legitimate or secure.
Step-by-Step Guide to Locating a Centre Online
The process of finding an Aadhaar centre is designed to be user-friendly, allowing you to quickly pinpoint a suitable location. Following these steps will guide you through the official UIDAI portal. This ensures you get accurate and up-to-date information.
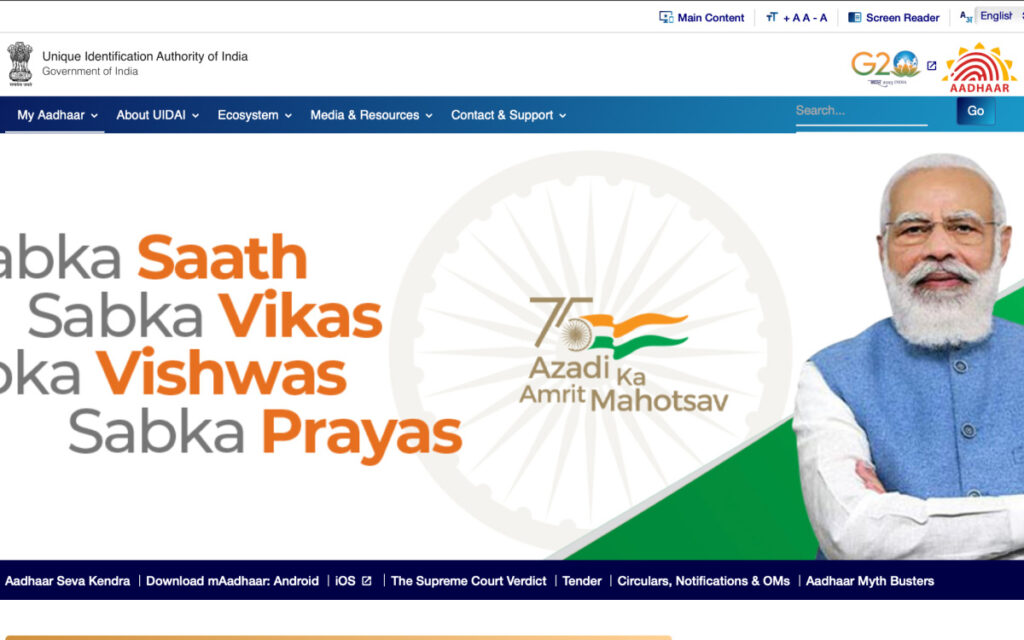
Step 1: Visit the official UIDAI portal. Open your web browser and navigate to the official Unique Identification Authority of India website at uidai.gov.in. This is the primary source for all Aadhaar-related services and information.
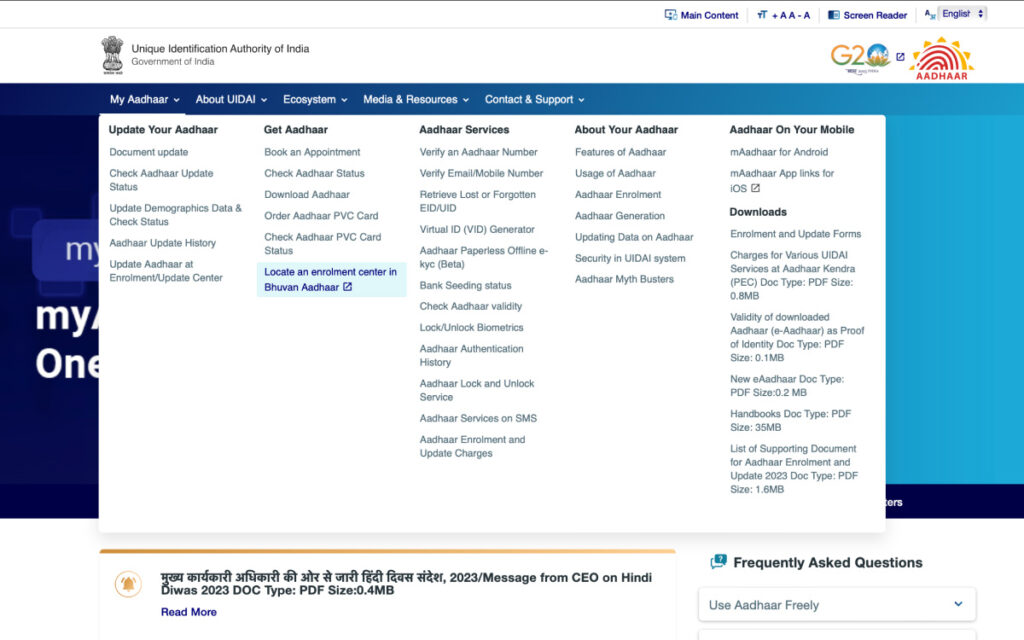
Step 2: Navigate to ‘Locate an Enrollment Centre’. On the UIDAI homepage, look for the ‘My Aadhaar’ section in the menu. Under this section, select the option ‘Locate an Enrollment Centre in Bhuvan Aadhaar’ to proceed.
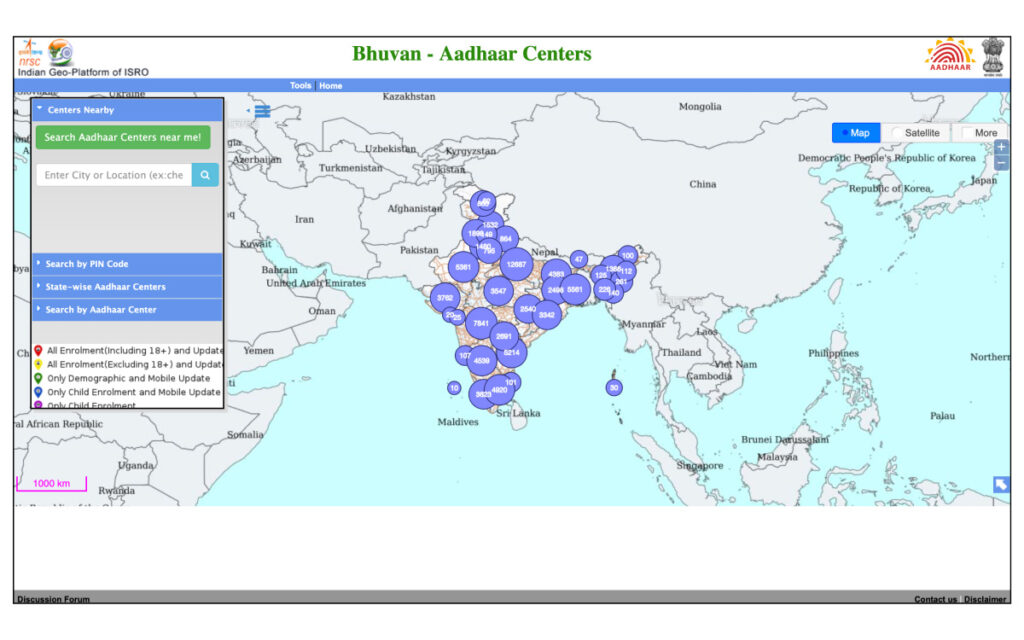
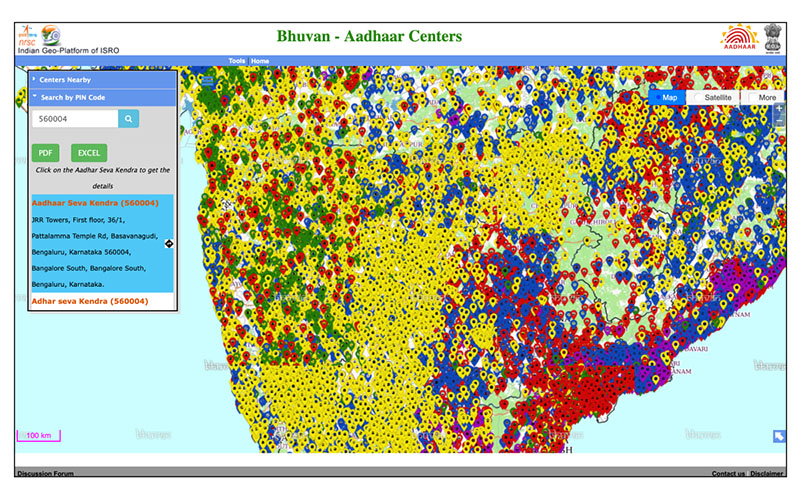
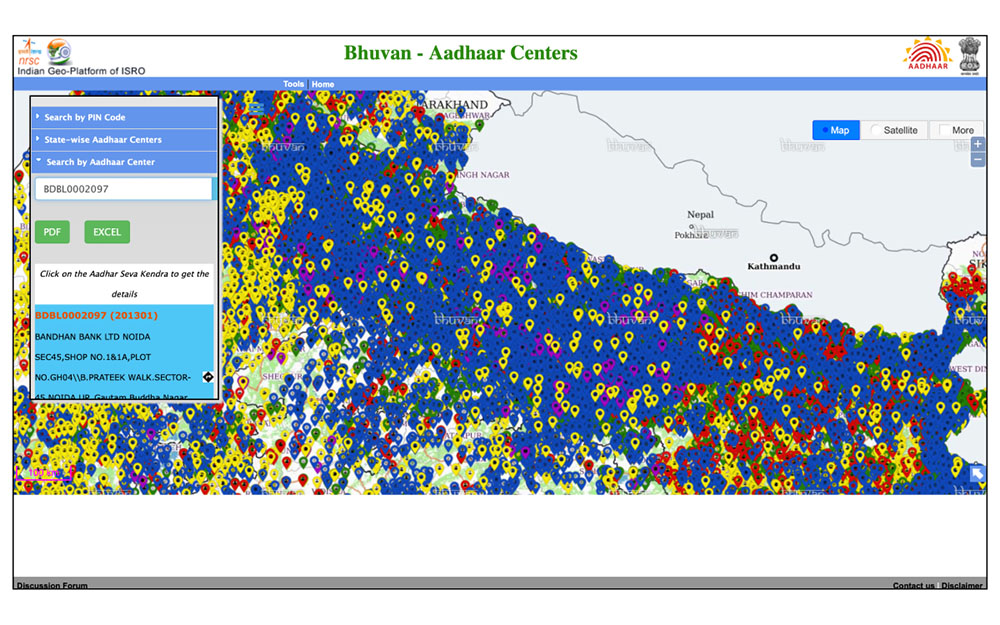
Step 3: Choose your search method. The portal provides three distinct options to find a centre: ‘Search by State’, ‘Search by PIN Code’, or ‘Search by Centre Name’. Select the method that is most convenient for you based on your current knowledge.
Visit the official UIDAI portal. Open your web browser and navigate to the official Unique Identification Authority of India website at uidai.gov.in. This is the primary source for all Aadhaar-related services and information.
Search Options Explained
Each search option on the UIDAI portal is designed to cater to different user needs, providing flexibility in locating a centre. Understanding how each method works will help you quickly find the information you require. This ensures efficiency in your search.
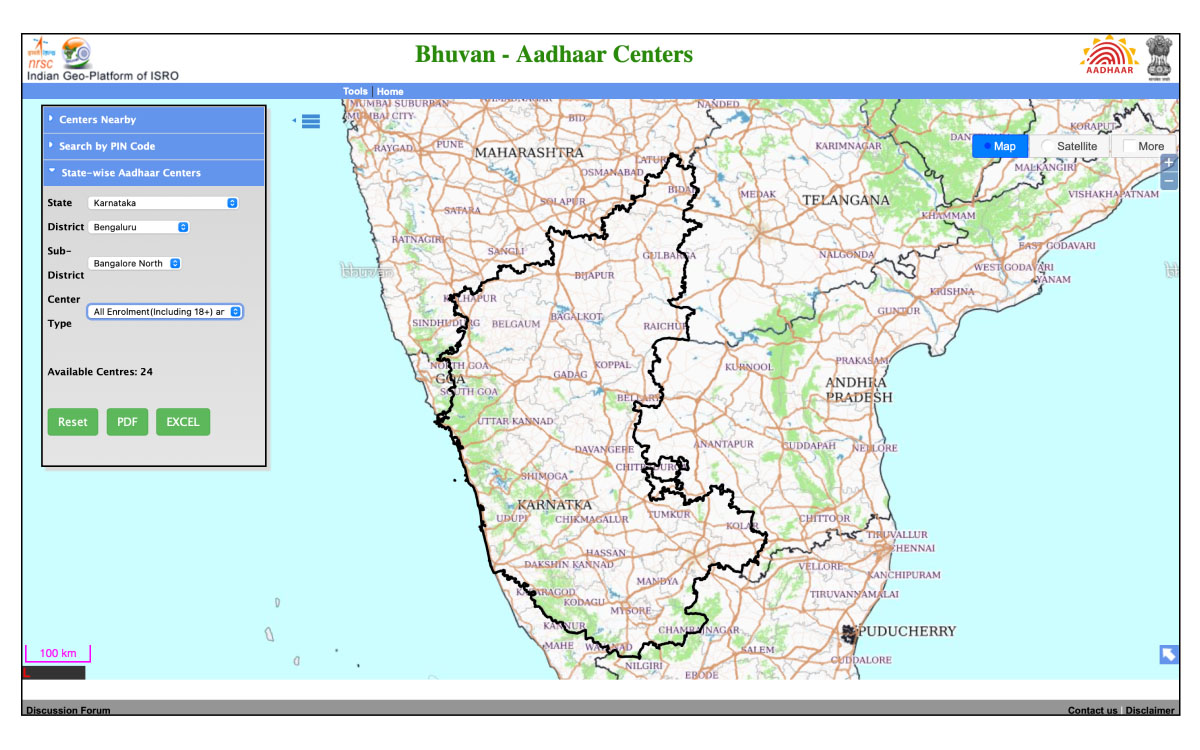
When you choose ‘Search by State’, you will need to enter your State (Karnataka), district, sub-district, and the type of centre you are looking for. This option is useful if you are exploring centres across a broader geographical area within Bangalore or nearby regions. It provides a comprehensive list.
The ‘Search by PIN Code’ option requires you to enter your 6-digit area PIN code. This is often the quickest way to find centres closest to your residence or workplace within Bangalore, offering highly localised results. For example, entering 560001 (for Shivajinagar) will show centres in that vicinity.
If you already know the name of a specific Aadhaar centre, the ‘Search by Centre Name’ option allows you to directly enter its name. This method will provide details for that particular centre, including its address and contact information. This is ideal if you have a recommendation or prior knowledge.
Documents Required for Aadhaar Enrollment and Updates
Presenting the correct and valid documents is a non-negotiable requirement for any Aadhaar-related service, whether it is a new enrollment or an update. The UIDAI has specific guidelines for acceptable proofs, which must be strictly followed. These guidelines ensure the integrity and accuracy of your Aadhaar data.
These documents are categorised into Proof of Identity (PoI), Proof of Address (PoA), Proof of Relationship (PoR), and Proof of Date of Birth (DoB). You must carry original documents for verification, as photocopies are generally not accepted at the enrollment centres. Digital copies are also typically not sufficient for initial verification.
Common Confusion: Digital vs. Original Documents
Misconception: A digital copy of a document on your phone is sufficient for Aadhaar verification. Correction: You must always carry the original physical documents for verification at the Aadhaar enrollment centre. Operators need to scan the originals.
Document Categories and Examples
Understanding the specific types of documents required for each category is crucial for a smooth application process. Preparing these in advance will save you time and prevent delays at the centre. Ensure all documents are current and valid.
| Document Category | Example Documents (2026) | Purpose |
| Proof of Identity (PoI) | PAN Card, Passport, Driving Licence, Voter ID, Government Photo ID Card | Verifies your name and photograph |
| Proof of Address (PoA) | Bank Statement (last 3 months), Utility Bill (electricity, water, gas – last 3 months), Rent Agreement (registered), Post Office Passbook | Confirms your current residential address |
| Proof of Relationship (PoR) | Birth Certificate, Marriage Certificate, Passport, Ration Card | Required for enrolling children or dependents, or for family head-based enrollment |
| Proof of Date of Birth (DoB) | Birth Certificate, SSLC Certificate, Passport, PAN Card | Establishes your official date of birth |
Common Mistakes with Documents
Many individuals encounter issues during their Aadhaar application process due to common errors related to documentation. Being aware of these pitfalls can help you avoid delays and multiple visits to the centre. Proper preparation is key to a successful application.
One frequent mistake is not carrying the original documents; only originals are accepted for scanning and verification at the enrollment centre. Bringing only photocopies will result in your application being refused, requiring you to reschedule your visit. Always double-check your documents before leaving home.
Another common error involves using expired identification or address proofs. Ensure that all your submitted documents are currently valid and reflect your most recent information. For instance, a utility bill should not be older than three months from the date of your visit.
Special Document Considerations for Children and Seniors
When enrolling children for Aadhaar, specific document requirements apply. For children under 5 years, their birth certificate and one parent’s Aadhaar card are typically sufficient. This links the child’s Aadhaar to a parent’s identity.
For senior citizens, while the standard PoI and PoA documents are generally needed, the process is streamlined to ensure ease of access. If a senior citizen lacks certain documents, the head of the family’s Aadhaar can be used with a Proof of Relationship document. Always confirm the latest guidelines on the UIDAI website.
The Aadhaar Enrollment and Update Process
The process of enrolling for a new Aadhaar or updating existing details at a Bangalore centre follows a structured sequence. Understanding these steps can help you prepare and ensure a smooth experience. Each step is designed to capture your information accurately and securely.
Once you arrive at an authorised centre, you will be guided through a series of actions designed to capture your demographic and biometric information accurately. The staff will assist you with any queries you may have, ensuring clarity at each stage. They are trained to facilitate the process efficiently.
Quick Context: Processing Timeframes (2026)
New Aadhaar enrollment typically takes 90 days for generation, while demographic updates can be processed within 5-10 days. Biometric updates also fall within the 5-10 day window. These are estimates and actual times may vary.
Step-by-Step Enrollment and Update Procedure
Following these steps meticulously will help you complete your Aadhaar application or update without unnecessary complications. It is advisable to arrive early, especially during peak hours, to avoid long queues.
Step 1: Fill out the application form. Obtain the Aadhaar enrollment or update form from the centre and fill in all the required demographic details accurately. Double-check all entries to prevent errors, as mistakes can lead to rejections.
Step 2: Submit required documents for verification. Present your original Proof of Identity, Proof of Address, and any other necessary supporting documents to the operator for verification and scanning. The originals will be returned to you immediately after scanning.
Step 3: Provide biometric data. Your fingerprints, iris scans, and a facial photograph will be captured by the operator. For children under five, only a photograph and demographic details are taken, with biometrics updated later at ages 5 and 15.
Step 4: Review and confirm details. Before final submission, the operator will show you the entered details on screen for your review. Carefully check all information for accuracy, including name, address, and date of birth.
Step 5: Receive the acknowledgment slip. After successful submission, you will receive an acknowledgment slip containing a 14-digit Enrollment ID (EID) and the date and time of enrollment. This slip is crucial for tracking your application status.
Fill out the application form. Obtain the Aadhaar enrollment or update form from the centre and fill in all the required demographic details accurately. Double-check all entries to prevent errors, as mistakes can lead to rejections.
Post-Enrollment Actions
After completing the enrollment or update process at the centre, there are a few important steps to follow. These actions ensure you can monitor your application and receive your Aadhaar card or updated details promptly.
You can check the status of your Aadhaar application by visiting the UIDAI portal and using your Enrollment ID (EID) from the acknowledgment slip. This allows you to track progress from submission to generation, providing transparency. The UIDAI provides a dedicated status check service.
Once your Aadhaar is generated, you can download an e-Aadhaar from the UIDAI website using your Aadhaar number or EID. The physical Aadhaar card will typically be dispatched to your registered address via post within a few weeks, usually within 60 days of generation.
Eligibility and Important Considerations for Aadhaar in Bangalore
Anyone residing in India, regardless of age, is eligible to apply for an Aadhaar card. This inclusive policy ensures that every resident can obtain a unique identity. However, there are specific considerations for different age groups and for those looking to update their details.
For instance, children below five years of age have different biometric requirements compared to adults. Their biometrics are linked to a parent’s Aadhaar and need to be updated upon reaching ages five and fifteen, ensuring their identity remains current. This is a mandatory update.
Pro Tip: Biometric Update Reminders
Set a calendar reminder for your child’s 5th and 15th birthdays to ensure their mandatory biometric updates are completed on time. UIDAI (2026) recommends proactive updates to avoid service interruptions.
Eligibility Criteria
Understanding who can apply for an Aadhaar card and under what conditions is fundamental. The UIDAI has simplified eligibility to ensure broad coverage across the resident population.
- Any resident of India, including infants, is eligible for Aadhaar enrollment.
- Demographic updates can be performed by any Aadhaar holder with valid proof documents.
- Biometric updates are mandatory for children at ages 5 and 15, and for adults every 10 years or if there are significant physiological changes.
- Non-Resident Indians (NRIs) who have resided in India for 182 days or more in the preceding 12 months are also eligible for Aadhaar.
Most Common Mistakes to Avoid
Avoiding certain common mistakes can significantly streamline your Aadhaar enrollment or update experience. Being prepared and attentive during the process is key to a successful outcome. These errors often lead to rejections or delays.
A frequent error is providing incorrect or inconsistent information on the application form, which can lead to rejections or delays. Always cross-verify all details against your supporting documents before submission. For example, ensure your name matches exactly across all proofs.
Another critical mistake is not thoroughly checking the details on the acknowledgment slip before leaving the centre. Any errors on this slip should be immediately brought to the attention of the operator for correction, as disputes later can be challenging.
Aadhaar for Non-Resident Indians (NRIs) in 2026
As of 2026, NRIs are eligible to apply for an Aadhaar card immediately upon arrival in India, provided they have a valid Indian passport. The 182-day residency requirement was removed for NRIs in 2019, making it easier for them to obtain Aadhaar. This facilitates their financial and administrative dealings in India.
NRIs need to visit an Aadhaar Enrollment Centre with their Indian passport and a valid Indian address proof. The process is similar to that for resident Indians, involving demographic and biometric data capture. An Aadhaar card can significantly simplify banking and property transactions for NRIs.
Fees and Charges for Aadhaar Services in 2026
Understanding the fee structure for various Aadhaar services is important to avoid any confusion or overcharging. The UIDAI sets specific charges for enrollment and updates, which all authorised centres must adhere to. These charges are standardised across India.
New Aadhaar enrollment is free of charge for all residents, making it accessible to everyone. However, certain update services and additional requests do incur a nominal fee. These fees are designed to cover the operational costs of the enrollment centres.
Common Confusion: Free vs. Paid Services
Misconception: All Aadhaar services are free of charge. Correction: While new Aadhaar enrollment is free, demographic and biometric updates, as well as printing services, have nominal charges as stipulated by UIDAI.
Standard Fees for Aadhaar Services (2026)
The following table outlines the official fees for various Aadhaar-related services as of 2026. Always confirm these charges at the centre or on the UIDAI website before proceeding with any service.
| Service Type | Official Fee (INR) | Notes |
| New Aadhaar Enrollment | 0 | Free for all residents |
| Mandatory Biometric Update (for children at 5 & 15 years) | 0 | Free, as it is a mandatory update |
| Demographic Update (Name, Address, DoB, Gender, Mobile, Email) | 50 | Each update incurs this charge |
| Biometric Update (Fingerprints, Iris, Photo) | 100 | This fee applies to voluntary biometric updates for adults |
| Aadhaar Download & Colour Print | 30 | For printing an e-Aadhaar copy at the centre |
Payment Methods and Transparency
Aadhaar enrollment centres typically accept cash payments for services. Some larger centres, especially those located in banks or post offices, may also offer digital payment options like UPI or debit card. Always ask for a receipt for your payment.
The fees are clearly displayed at all authorised centres, ensuring transparency. If a centre attempts to charge more than the prescribed fees, you should report this to the UIDAI through their official grievance redressal mechanism. Parvathi ensures she always checks the fee chart before any transaction.
Addressing Common Issues and Troubleshooting Aadhaar Applications
Despite a streamlined process, individuals may occasionally encounter issues during their Aadhaar application or update. Knowing how to address these common problems can save you time and frustration. Proactive troubleshooting is often the best approach.
Delays in processing are one frequent concern. While UIDAI provides estimated timelines, unforeseen technical issues or high volumes can extend these periods. It is important to regularly check your application status using your EID.
Pro Tip: Track Your Application Diligently
After applying, regularly check your Aadhaar status on the UIDAI website (uidai.gov.in) using your Enrollment ID (EID). This helps you identify any delays or issues early and take necessary action.
Common Reasons for Application Rejection
Understanding why an Aadhaar application might be rejected helps you prepare better and avoid these pitfalls. Most rejections stem from preventable errors during the application process.
- Mismatch in demographic details between the application form and supporting documents.
- Submission of invalid, expired, or unrecognised Proof of Identity or Proof of Address documents.
- Poor quality biometric capture, such as unclear fingerprints or iris scans, requiring re-capture.
- Duplicate enrollment attempts if an Aadhaar number has already been issued to the individual.
- Incomplete application forms or missing mandatory information.
What to Do if Details on Acknowledgment Slip Are Incorrect
If you notice any errors on your acknowledgment slip immediately after submission, it is crucial to bring it to the operator’s attention before leaving the centre. They can often make immediate corrections, saving you a future update process.
If you only discover an error later, you will need to apply for a demographic update at an Aadhaar enrollment centre. This will incur the standard fee for demographic updates. Always review the slip carefully before you exit the premises.
Contacting UIDAI Support
For any grievances, status inquiries, or general information, the UIDAI offers multiple channels for support. Their helpline and online portal are designed to assist residents effectively.
- UIDAI Toll-Free Helpline: Dial 1947 from any landline or mobile phone for assistance. This service is available in multiple languages.
- Online Grievance Portal: Visit the UIDAI website to lodge a complaint or track the status of a previously submitted grievance.
- Email Support: Send your queries or concerns to [email protected] for official assistance.
Benefits of an Updated Aadhaar in India’s Digital Economy
An updated Aadhaar card is more than just an identity document; it is a gateway to numerous services and benefits in India’s rapidly evolving digital economy. Its accuracy ensures seamless integration with various platforms. This makes it indispensable for modern living.
The government and private sector increasingly rely on Aadhaar for secure and efficient verification processes. Maintaining current details ensures you can fully leverage these digital advancements without encountering hurdles. This positively impacts financial inclusion and service delivery.