The Reserve Bank of India (RBI) has introduced a significant measure to ensure the safety and security of financial transactions in the country. All financial institutions must now comply with the Know Your Customer (KYC) process, which involves verifying the identity of their users. This measure is mandatory for all users who wish to engage in transactions with their banks. In this blog, we will delve into the reasons behind the implementation of KYC and its importance in the current financial landscape.
What is Know Your Customer or KYC?
KYC, or Know Your Customer, is a crucial process implemented by financial institutions to verify and identify the identity of their customers. It was introduced by the Reserve Bank of India (RBI) in 2002 as a regulatory measure to combat money laundering and financial fraud. The primary objective of KYC is to ensure that banks and other financial institutions have sufficient information about their customers to understand their financial activities and assess potential risks.
The following points provide further information about KYC:
- The RBI, India’s central banking institution, made it mandatory for all financial institutions to adhere to the KYC guidelines. These guidelines were introduced to establish a comprehensive framework for customer identification and due diligence.
- KYC enables organizations and financial institutions to obtain essential information about their customers, such as their identity, address, occupation, and source of income. By understanding customers better, financial institutions can assess their risk profile and provide appropriate financial services.
- One of the primary purposes of KYC is to prevent money laundering. By verifying the identity of customers and understanding their financial activities, financial institutions can detect and deter illegal activities, such as money laundering, terrorist financing, and other illicit transactions.
- All financial institutions operating in India are obligated to implement and follow KYC procedures as per the RBI’s guidelines. This ensures a standardized approach across the industry and helps maintain the integrity of the financial system.
- KYC is required for both new customers opening accounts and existing customers maintaining their accounts. This ensures that the identity and details of all customers are verified and updated regularly.
- Financial institutions are responsible for periodically updating the KYC records of their customers. This ensures that the information remains current and accurate. Regular updates also help in identifying any changes in customer behavior or suspicious activities.
- KYC procedures assist in detecting fraudulent activities within customer accounts. By monitoring and analyzing customer transactions, financial institutions can identify unusual patterns, unauthorized activities, or suspicious transactions that may indicate fraud or identity theft.
Why Is It Mandatory to Complete KYC?
KYC (Know Your Customer) is mandatory because it helps financial institutions verify the identity of their customers, assess potential risks, prevent fraud, and comply with legal and regulatory requirements. By completing KYC, institutions can build trust with their customers and safeguard the financial system’s integrity.
What Are the Types of KYC Verification?
To comply with KYC regulations, financial institutions require both new and existing customers to undergo the KYC verification process when opening an account. There are 5 methods for customers to complete their KYC verification:
| Method | Description |
|---|---|
| Video KYC | Enables customers to undergo the verification process remotely through video calls. They interact with a representative and provide identification documents electronically. Real-time video interaction ensures accurate verification, offers convenience, and eliminates the need for physical presence. |
| e-KYC | Leverages digital technologies, allowing customers to provide identification details and relevant documents through online platforms or mobile applications. This streamlined process minimizes paperwork, enabling faster and efficient customer onboarding. |
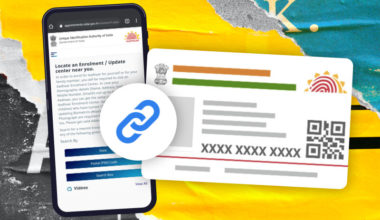
| Aadhaar-Based KYC | Utilizes the unique Aadhaar identification number issued by the Indian government. Customers provide their Aadhaar details for electronic verification, simplifying the KYC process by leveraging the government’s Aadhaar database and streamlining the verification process. |
| In-Person Verification | Requires customers to visit a branch or office of the financial institution for face-to-face verification. It offers direct interaction, allowing representatives to verify identification documents and ensure authenticity. While it provides thorough scrutiny, it can be time-consuming and less accessible for certain individuals. However, it promotes trust, security, and compliance with regulatory requirements. |
How to Complete KYC Online?
Completing KYC (Know Your Customer) online is a simple and convenient process. Follow these steps to successfully complete the KYC procedure:
- Visit the official website of a recognized KRA (KYC Registration Agency) or a fund house that offers online KYC services.
- Provide your Aadhaar card details, including your unique Aadhaar number.
- Verify your identity by entering the OTP (One-Time Password) sent to your registered mobile number linked to your Aadhaar.
- Click on ‘Submit’ to initiate the verification process.
- The provided details will be authenticated by the UIDAI (Unique Identification Authority of India), ensuring accuracy and validity.
- Once the verification is successfully completed, the KRA will approve your KYC status if all the details provided are correct and meet the necessary requirements.
- To check the status of your KYC, you can visit the KRA portal and enter your PAN (Permanent Account Number) details.
- By regularly checking your KYC status, you can ensure that your information is up to date and compliant with regulatory requirements
Completing the KYC process online allows you to conveniently fulfill the necessary requirements for various financial services, such as opening a bank account, investing in mutual funds, or trading in securities. It helps establish your identity, ensures transparency, and facilitates smooth transactions while adhering to regulatory guidelines.
How to Complete KYC Offline?
All an applicant needs to do is follow the instructions-
- Visit the official website of the KRA (KYC Registration Agency) and download the KYC form. Ensure that you download the latest version of the form to have the most up-to-date requirements.
- Complete the KYC form with accurate and complete details. Provide all the necessary information as requested in the form, including personal details, address, identification proof, and other relevant information.
- Locate the nearest KRA center or authorized agency where you can submit your completed KYC form. Carry the duly filled form along with the necessary supporting documents, such as identification proof, address proof, and any other documents as specified by the KRA.
- Submit the filled KYC form and the required documents to the concerned personnel at the KRA center. They will verify the information provided and ensure that all necessary documents are in order.
- Upon submission, you will receive an application number or acknowledgement receipt. This number is important as it allows you to track the status of your KYC application.
- Use the provided application number to track the progress of your KYC application. You can typically do this by visiting the KRA’s website or contacting their customer support helpline.
Completing KYC offline allows individuals to comply with regulatory requirements for various financial services, such as opening bank accounts, applying for loans, or investing in financial instruments. It ensures that the provided information is accurate, helps prevent fraud, and promotes transparency in financial transactions.
How to Complete KYC Using Aadhaar Biometrics?
Completing KYC using Aadhaar biometrics simplifies the investment process and allows individuals to invest higher amounts. It streamlines the verification process by utilizing biometric data from the Aadhaar card, ensuring a secure and efficient KYC procedure.
Follow the given instructions to complete KYC through Aadhaar biometrics-
- Locate the official office of the KRA (KYC Registration Agency) or visit a fund house that offers Aadhaar biometric KYC services.
- Fill out the online KYC registration form: Complete the online KYC registration form provided by the KRA or the fund house. Provide all the required details accurately and ensure that you select the option for Aadhaar biometrics.
- During the registration process, you will be prompted to provide your Aadhaar card details. Follow the instructions to initiate the online Aadhaar biometrics verification process.
- After submitting the online form, a representative from the Fund House will schedule a visit to your home or office for verification purposes. They will verify your identity and collect the necessary documents as per KYC requirements.
- Once the verification visit is successfully conducted and your biometrics are authenticated, the KYC process will be considered complete.
What are the Documents Required to Complete KYC Verification?
Following documents are required by individuals to get the KYC verification done-
FOR INDIVIDUALS
| Document Category | List of Documents |
|---|---|
| Registration | Duly filled form with signatures |
| Identity Proof | PAN card with Photograph, Aadhaar card/Passport/Driving License/Voter ID card, Identity cards issued by Public Sector undertakings/Public Financial Institutions/Scheduled Commercial Banks, Identity card or a document with the applicant’s photo issued by Central/State department or its departments, Regulatory/Statutory Authorities, Self-attested address proof, Identity cards issued by College affiliated by Universities or Personal Bodies like ICWAI, ICSI, ICAI, Bar Council, Passport size photograph |
| Address Proof | Ration Card/Voter ID Card/Passport/Driving License/Flat Maintenance bill/Insurance Copy/Registered Lease or Sale Agreement of Residence, Bank Account Statement/Passbook (not older than 3 months), Utility Bills (not older than 3 months), Self Declaration Copy by the High Court or Supreme Court Judges (new address with PIN code), Proof of Address issued by Multinational Foreign Bank, Managers of Scheduled Commercial Banks/Scheduled Co-operative Bank/Notary Public/Elected Representative to the Legislative Assembly/Gazetted Officer/Parliament/Documents issued by any Government or Statutory Authority, Document with current address issued by Central/State Government and its Departments, Statutory/Regulatory Authorities, Scheduled Commercial Banks, Public Financial Institutions, Public Sector Undertakings, Colleges affiliated to Universities and Professional Bodies such as ICSI, ICWAI, ICAI, Bar Council, Current address in the name of the spouse |
FOR NON-INDIVIDUALS
| Types of Entity | List of Documents |
|---|---|
| Partnership Firm | Copy of balance sheets for the last 2 financial years (to be submitted every year), Certificate of registration (for registered partnership firms only), Copy of partnership deed, Authorized signatories list with specimen signatures, Photograph, POA, POI, PAN of Partners |
| Trust | Certificate of registration (for registered trust only), Copy of the balance sheets for the last 2 financial years (to be submitted every year), Copy of Trust deed, List of trustees certified by managing trustees/CA, Photograph, POA, POI, PAN of Trustees |
| Corporate | Copy of the balance sheets for the last 2 financial years (to be submitted every year), Photograph, POI, POA, PAN and DIN numbers of whole-time directors/two directors in charge of day to day operations, Photograph, POA, POI, PAN of individual promoters holding control – either directly or indirectly, Copies of the Memorandum and Articles of Association and certificate of incorporation, Copy of the Board Resolution for investment in securities market, Copy of latest shareholding pattern including list of all those holding control, either directly or indirectly, in the company in terms of SEBI takeover Regulations, duly certified by the company secretary/Whole time director/MD (to be submitted every year), Authorized signatories list with specimen signatures |
| HUF | PAN of HUF, Deed of declaration of HUF/List of coparceners, Bank passbook/bank statement in the name of HUF, Photograph, POA, POI, PAN of Karta |
| Institutional Investors/Banks | Copy of the constitution/registration or annual report/balance sheet for the last 2 financial years, Authorized signatories list with specimen signatures |
| Body of Individuals/Unincorporated Association | Proof of Existence/Constitution document, Resolution of the managing body & Power of Attorney granted to transact business on its behalf, Authorized signatories list with specimen |


