

Your Aadhaar number is a vital digital identity, linking you to many essential services across India. If you’ve faced difficulties with enrolment or updates before, you’re alone, and it’s understandable to feel frustrated by the process. However, getting your Aadhaar in order is crucial for accessing benefits designed to support you.
This guide is specifically designed for elderly citizens, offering a clear, step-by-step approach to simplify Aadhaar enrolment and updates. It addresses common hurdles, clarifies what documents you’ll need, and explains how to manage the process smoothly, ensuring a successful outcome this time around. You’ll gain confidence in managing your Aadhaar, making sure you don’t miss out on important support.
Table of Contents
What Is Aadhaar?
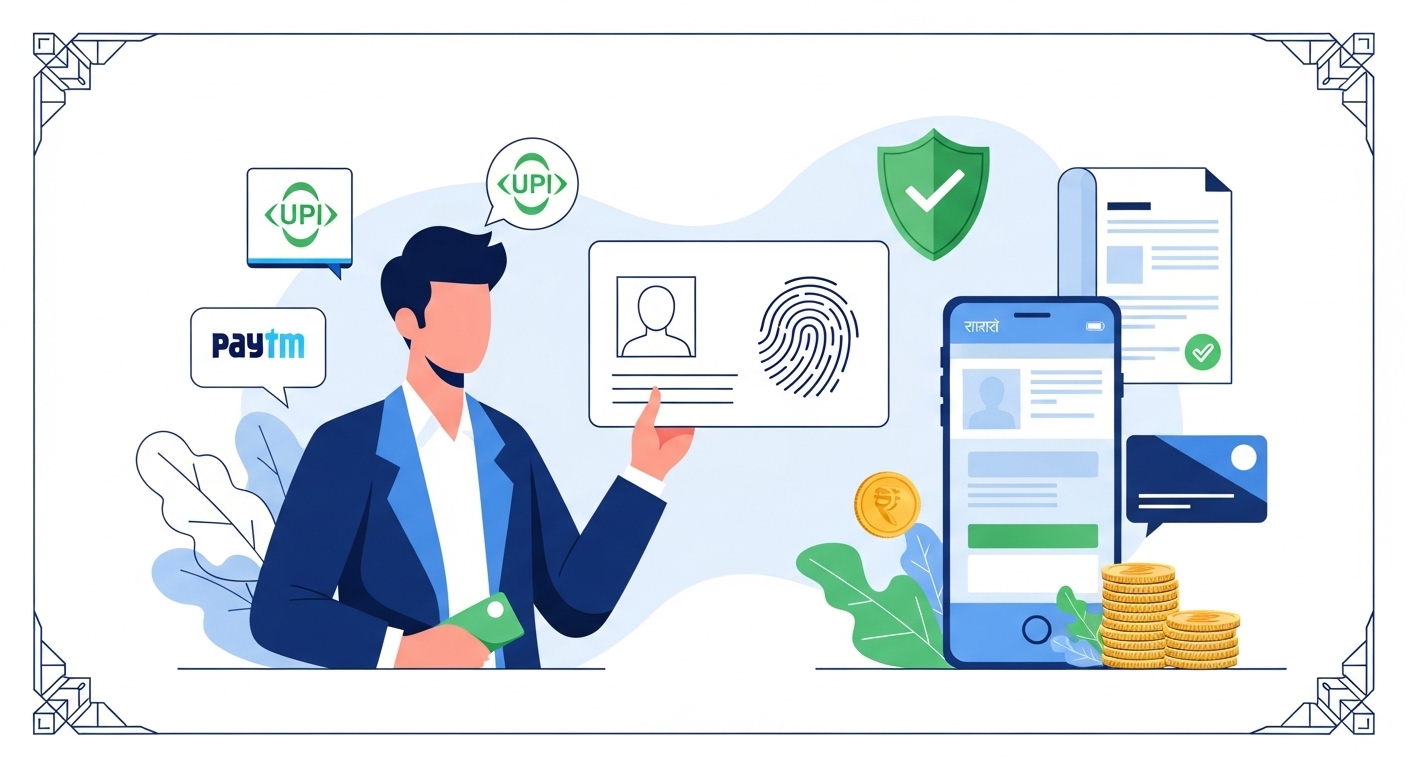
Aadhaar is a unique 12-digit identification number issued by the Unique Identification Authority of India (UIDAI), serving as your primary proof of identity. This number is generated based on your demographic information and biometric data, including fingerprints, iris scans, and a facial photograph. A
ccording to UIDAI (2026), over 1.4 billion Aadhaar numbers have been issued, making it a widespread and fundamental identification system. If your Aadhaar information isn’t correct or up-to-date, you might struggle to open vital government subsidies, pension schemes, or even basic banking services. T
o ensure you receive all your entitled benefits and services, you’ll need to visit an official Aadhaar Enrolment Centre or use the dedicated UIDAI online portal.
What is Aadhaar and Why is it Important for You?
Understanding your Aadhaar and its importance is the first step, especially if you’ve found the process confusing in the past. It’s more than a card; it’s a unique digital identity that helps confirm who you are when you need to open various services. This system is designed to make interactions with government and financial institutions much simpler and more secure for you.
Understanding Your Unique Aadhaar
Your Aadhaar number is truly one-of-a-kind, assigned only to you, and it stays with you for life. It acts as a universal identifier, meaning you can use it across different states and for various purposes. This uniqueness helps prevent fraud and ensures that benefits reach the right person, which is a key reason why it’s so widely used today.
Quick Context: Biometric Updates
Your fingerprints and iris scans, known as biometrics, are linked to your Aadhaar. It’s a good idea to update these every ten years or if there are significant changes, ensuring your identity remains easily verifiable.
How Aadhaar Helps You
Aadhaar simplifies many daily tasks, from receiving your pension to opening a bank account. It removes the need for multiple documents, as your Aadhaar often serves as sufficient proof of identity and address. This streamlining is particularly helpful for elderly citizens, reducing the paperwork and hassle involved in accessing essential services.
Here’s how Aadhaar specifically helps you:
Direct Benefit Transfers
Pensions like the Indira Gandhi National Old Age Pension Scheme (IGNOP) are often linked to Aadhaar for direct deposit into your bank account, as per the National Social Assistance Programme (NSAP.nic.in 2026).
Banking Services
You can open new bank accounts or use Aadhaar-enabled Payment Systems (AePS) for basic banking transactions like withdrawals and balance enquiries at your local banking correspondent. According to NPCI (2026), AePS makes banking accessible even in remote areas.
Government Subsidies
Accessing subsidies for cooking gas (LPG) or ration under the Public Distribution System becomes much easier with a verified Aadhaar.
Pension Schemes
Beyond IGNOP, other pension schemes and welfare programmes rely on Aadhaar for accurate beneficiary identification and disbursement.
Aadhaar for Essential Services
Aadhaar has become a cornerstone for accessing many government and financial services, making your life more convenient. It ensures that you receive your rightful benefits without unnecessary delays or complications. This system helps to build trust and transparency in how services are delivered to you.
Common Confusion: Aadhaar is compulsory for everything
A widespread myth is that Aadhaar is compulsory for every single service, including private ones.
While Aadhaar is mandatory for many government subsidies and welfare schemes, you’re not always required to provide it for all private services unless specifically mandated by law.
Getting Your First Aadhaar Card
Applying for your first Aadhaar card can seem daunting, especially if you’ve had a tough time with official processes before. However, with the right information and preparation, you can complete this important step successfully. This section will guide you through each stage, ensuring you’re well-equipped for your visit to the Aadhaar centre.
Who Can Apply for Aadhaar?
Anyone who is a resident of India, regardless of their age, can apply for an Aadhaar number. This includes infants, children, and, elderly citizens like yourself.
There are no restrictions based on your financial status or background, ensuring everyone has open to this unique identity. The UIDAI (2026) aims to cover all residents, making identification universal.
Documents You Will Need to Apply
Having the correct documents is crucial for a smooth application process and often the reason for past difficulties. You’ll need to provide proof of identity (PoI) and proof of address (PoA). It’s best to carry original documents, as these will be scanned and returned to you.
| Document Type | Accepted Examples |
| Proof of Identity (PoI) | Passport, PAN Card, Ration/PDS Photo Card, Voter ID, Driving Licence |
| Proof of Address (PoA) | Passport, Bank Statement/Passbook, Post Office Account Statement/Passbook, Ration Card, Voter ID, Driving Licence, Electricity Bill (not older than as per the latest official guidelines) |
| Proof of Date of Birth (DoB) | Birth Certificate, SSLC Certificate, Passport, PAN Card |
Remember, if you don’t have individual documents, a head of family (HoF) can introduce you with their own PoI and PoA, or you can use a certificate of identity issued by an authorised official. Always check the official UIDAI website for the most current list of accepted documents, as per the latest official guidelines.
Finding a Nearby Aadhaar Centre
Locating an official Aadhaar Enrolment and Update Centre is simple, and it’s essential to use authorised centres only. These are the places where your biometrics will be captured and your documents verified. Using the official website ensures you find a legitimate and reliable centre.
Step 1: Open your web browser and visit the official UIDAI website at uidai.gov.in.
Step 2: Look for the “Locate an Enrolment & Update Centre” option on the homepage.
Step 3: You can then search for a centre by entering your State, District, or Pin Code, which will show you a list of nearby authorised locations.
Step 4: Once you’ve identified a convenient centre, consider booking an appointment online through the portal to save time and avoid long queues.
Quick Context: Online Appointment
Booking an appointment online before visiting an Aadhaar centre can significantly reduce your waiting time. It helps the centre manage crowds and ensures a quicker process for you.
What Happens at the Centre?
When you arrive at the Aadhaar centre, the staff will guide you through the enrolment process. They are there to help, so don’t hesitate to ask questions if you’re unsure about anything. This step involves several important actions to capture your unique identity details.
First, you’ll need to fill out the Aadhaar Enrolment Form, providing your basic demographic details. Next, the operator will scan your original documents, verifying them against the information you’ve provided on the form.
After document verification, your biometric data-fingerprints, iris scans, and a facial photograph-will be captured digitally. It’s crucial to carefully review all the information displayed on the screen before the final submission, as per UIDAI (2026) guidelines, to ensure there are no errors.
Receiving Your Aadhaar Letter
After successfully completing your enrolment, you’ll receive an acknowledgement slip with a 14-digit Enrolment ID (EID) and the date and time of enrolment. This EID is vital for tracking the status of your Aadhaar application. You can use this EID to check if your Aadhaar has been generated on the official UIDAI website.
Once generated, you can download your e-Aadhaar from the UIDAI resident portal at resident.uidai.gov.in. The physical Aadhaar letter is usually dispatched to your registered address via post within a few weeks. If you don’t receive it, the e-Aadhaar is as valid and can be used immediately.
Updating Your Aadhaar Information
It’s common for personal details to change over time, and keeping your Aadhaar information current is as important as getting it in the first place. If a previous update attempt was unsuccessful, it might have been due to incorrect documents or a misunderstanding of the process. This section will clarify exactly when and how you can update your Aadhaar, making sure you get it right this time.
When You Might Need Updates
Your Aadhaar details need updating for various reasons, ensuring your identity remains accurate and verifiable. An outdated mobile number, for instance, can prevent you from receiving important OTPs for online services, making many digital transactions impossible. Regularly checking your Aadhaar details ensures they reflect your current situation.
Here are key reasons you might need to update your Aadhaar:
- Change of Address: If you’ve moved to a new home, updating your address ensures you receive official communications and can open local services.
- Mobile Number Update: This is critical for receiving OTPs, which are essential for most online Aadhaar-related services and many other digital transactions.
- Name Correction: Any spelling mistakes or changes in your name (e.g., after marriage) should be corrected to match other official documents.
- Date of Birth Correction: If your date of birth was entered incorrectly during enrolment, it’s vital to rectify it to avoid discrepancies.
- Biometric Updates: Over time, your fingerprints and iris patterns can change, especially for elderly citizens. UIDAI recommends updating biometrics every 10 years to maintain accuracy.
What Information Can You Change?
You can update both your demographic and biometric information linked to your Aadhaar. This flexibility ensures that your Aadhaar remains a true reflection of your current identity. Knowing what you can change helps you prepare for the update process, as per UIDAI guidelines (2026).
You can update the following details:
- Demographic Details: This includes your name, address, date of birth, gender, mobile number, and email address. Most of these can often be updated online.
- Biometric Details: This covers your fingerprints, iris scans, and facial photograph. These updates always require a physical visit to an Aadhaar Enrolment Centre.
How to Update Aadhaar Online
For certain demographic updates, the UIDAI Self Service Update Portal (SSUP) offers a convenient online option from the comfort of your home. This method is generally faster and avoids the need for a physical visit, provided you have the necessary documents. Make sure your mobile number is already linked to Aadhaar to receive the One Time Password (OTP).
Step 1: Visit the official UIDAI Self Service Update Portal at resident.uidai.gov.in/aadhaar-update.
Step 2: Log in using your 12-digit Aadhaar number and the OTP sent to your registered mobile number.
Step 3: Select the specific demographic field you wish to update, such as your address or name.
Step 4: Upload scanned copies of the required supporting documents as proof for the change you’re making.
Step 5: Review all the entered information carefully, then proceed to pay the nominal update fee online using a debit card, credit card, or net banking, as per the latest official guidelines.
Step 6: You’ll receive an Update Request Number (URN) which you can use to track the status of your request.
Updating at an Enrolment Centre
Some updates, especially biometric ones, cannot be done online and require a visit to an Aadhaar Enrolment Centre. This method is also suitable if you prefer in-person assistance or if your mobile number isn’t linked to your Aadhaar. The centre staff will guide you through the process, ensuring accuracy.
Step 1: Book an appointment online through the UIDAI portal for your preferred Aadhaar Enrolment Centre to minimise waiting time.
Step 2: Visit the centre with all your original supporting documents and a copy of the Aadhaar Update/Correction Form, which you can download from the UIDAI website.
Step 3: The operator will help you fill out the form, verify your documents, and capture your updated biometrics (if required).
Step 4: Pay the applicable fee for the update, as per the latest official guidelines, and collect your acknowledgement slip with the URN.
Common Confusion: Aadhaar Updates Online
It is commonly assumed that all Aadhaar updates can be completed online.
While many demographic details can be changed through the online portal, updates to your biometric information (fingerprints, iris, photograph) always require a physical visit to an Aadhaar Enrolment Centre.
Documents Needed for Updates
like with initial enrolment, providing the correct documents is paramount for a successful update. The type of document needed depends on the information you’re changing. Always carry the original documents for verification purposes.
Here are common documents required for updates:
- For Address Update: Passport, Bank Statement/Passbook, Post Office Account Statement/Passbook, Ration Card, Voter ID, Driving Licence, Electricity Bill (not older than as per the latest official guidelines).
- For Name Correction: Passport, PAN Card, Ration/PDS Photo Card, Voter ID, Driving Licence.
- For Date of Birth Correction: Birth Certificate, SSLC Certificate, Passport, PAN Card.
- For Mobile Number/Email Update: No document is typically required, but your presence at the centre (for biometric authentication) or OTP to registered mobile (for online) is necessary.
Always refer to the official UIDAI website at resident.uidai.gov.in/aadhaar-update for the most up-to-date and complete list of accepted documents for each type of update.
Common Questions About Your Aadhaar
It’s natural to have questions, especially if you’ve had a less-than-ideal experience with Aadhaar in the past. Addressing these common queries can help clear up any lingering confusion and help you to manage your Aadhaar confidently. Knowing the answers to these questions makes the entire process much smoother.
Is Aadhaar Compulsory for You?
The question of whether Aadhaar is compulsory often causes confusion. While it’s not universally mandatory for every single service, it has become essential for accessing many government benefits and subsidies. For instance, receiving your pension under schemes like IGNOP often requires Aadhaar linkage to ensure direct and transparent transfers.
According to UIDAI (2026), Aadhaar serves as a primary identity document for most government welfare schemes. However, it’s generally not compulsory for private services unless specific regulations apply. If you’re applying for a government service or benefit, it’s highly likely Aadhaar will be required.
What if You Lose Your Card?
Losing your physical Aadhaar card can be worrying, but it’s not a major problem as your Aadhaar number remains safe and accessible. You don’t need to apply for a new one; you can easily retrieve your e-Aadhaar or order a reprint. The digital version is as valid as the physical card.
Step 1: Visit the official UIDAI website at uidai.gov.in.
Step 2: Look for the “Retrieve Lost or Forgotten EID/Aadhaar Number” option under the “My Aadhaar” section.
Step 3: Enter your full name, your registered mobile number, or email address.
Step 4: You will receive an OTP on your registered mobile number; enter this to retrieve your Aadhaar number or Enrolment ID (EID).
Step 5: Once you have your Aadhaar number, you can then go to the “Download Aadhaar” section and get your e-Aadhaar.
Step 6: If you prefer a physical card, you can order a “Reprint Aadhaar” from the same portal for a nominal fee.
Pro Tip: Keep Mobile Number Updated
Always ensure your current mobile number is linked to your Aadhaar. This is crucial for receiving OTPs, which are necessary for most online Aadhaar services, including retrieving a lost Aadhaar or making updates.
Checking Your Aadhaar Status
After applying for a new Aadhaar or requesting an update, you’ll naturally want to know its progress. The UIDAI provides easy ways to track your application status using the numbers you received at the centre. This transparency helps you stay informed and plan accordingly.
If you applied for a new Aadhaar, use the 14-digit Enrolment ID (EID) and the date/time stamp from your acknowledgement slip on the UIDAI resident portal to check its generation status. For updates, you’ll use the 14-digit Update Request Number (URN) you received. visit resident.uidai.gov.in and select the “Check Aadhaar Status” or “Check Aadhaar Update Status” option.
Is Your Aadhaar Data Secure?
The security of your personal information linked to Aadhaar is a top concern, and UIDAI has implemented strong measures to protect it. Your biometric data is stored securely and is not shared without your consent. This system is designed to provide a high level of data protection.
UIDAI uses strong encryption and security protocols to safeguard your data. When you use your Aadhaar for authentication, only a ‘Yes’ or ‘No’ response is sent back, confirming your identity without revealing your personal details. This process, known as Aadhaar Authentication (uidai.gov.in/aadhaar-authentication 2026), ensures that your data remains private while verifying your identity for services.
Quick Context: Aadhaar Authentication
Aadhaar authentication is a secure way for service providers to confirm your identity. It uses your biometrics or OTP to verify you, ensuring that only you can open services linked to your Aadhaar.
Important Things to Remember About Aadhaar
Managing your Aadhaar effectively means more than having the card; it involves understanding how to keep it safe and how to avoid potential pitfalls. If you’ve encountered issues in the past, these reminders will help you manage the system more confidently in the future. Staying informed is your best defence.
Keep Your Aadhaar Safe
Protecting your Aadhaar number and card is essential to prevent misuse. Treat it with the same care you would your other important documents like your passport or bank passbook. Your Aadhaar is a powerful identity tool, and keeping it secure helps protect your financial and personal information.
Avoid sharing your Aadhaar number unnecessarily or in public places. When you need to provide a copy, consider using a masked Aadhaar (e-Aadhaar with only the last four digits visible) if the service allows it. You can also lock your Aadhaar number or biometrics through the UIDAI portal, which adds an extra layer of security by preventing any authentication without your explicit unlock.
Spotting Aadhaar-Related Scams
Unfortunately, scams related to Aadhaar do exist, and it’s important to be vigilant, especially for elderly citizens. Scammers often try to trick you into revealing your Aadhaar number, OTP, or other personal details. Always remember that official bodies will never ask for sensitive information over the phone or through unsolicited emails.
Common Confusion: Aadhaar Scams and Official Calls
It is commonly assumed that official-looking calls asking for Aadhaar details are legitimate.
UIDAI or any government agency will never ask for your Aadhaar OTP, PIN, or full Aadhaar number over the phone, SMS, or email.
Be suspicious of any calls, messages, or emails asking you to “update” your Aadhaar by clicking on a link or sharing an OTP. These are almost always fraudulent attempts to gain open to your information. Always verify information through official channels only.
Where to Find Official Help
If you have any doubts, questions, or need assistance with your Aadhaar, always reach out to official sources. Relying on unverified information can lead to errors or expose you to scams. The UIDAI provides multiple channels for support, ensuring you can get reliable help when you need it.
You can contact the UIDAI helpline by dialling 1947, a toll-free number available in multiple languages. For detailed information and self-service options, the official UIDAI website at uidai.gov.in is your go-to resource. Additionally, visiting an authorised Aadhaar Enrolment Centre provides you with in-person assistance from trained professionals.
Conclusion
Getting your Aadhaar enrolled or updated successfully is a crucial step towards smooth open to many essential services and benefits. While you may have faced difficulties in the past, understanding the process and preparing correctly makes a significant difference.
By following the steps outlined in this guide and using the official resources, you can ensure your Aadhaar information is accurate and secure. Taking this proactive step now will simplify your interactions with government services and help you receive your rightful pensions and subsidies without any further hassle.
