To receive your government benefits smoothly, your Aadhaar must be correctly linked to your bank account for Direct Benefit Transfers (DBT). This simple tutorial will walk you through each step to seed your Aadhaar accurately, ensuring your financial support arrives without any issues.
This article provides a straightforward tutorial on how to accurately link your Aadhaar to your bank account for DBT purposes. You will learn the importance of this process, discover various methods to complete the linking, understand how to verify its status, and find practical solutions for common issues that might arise.
Table of Contents
What Is DBT Bank Account Seeding?
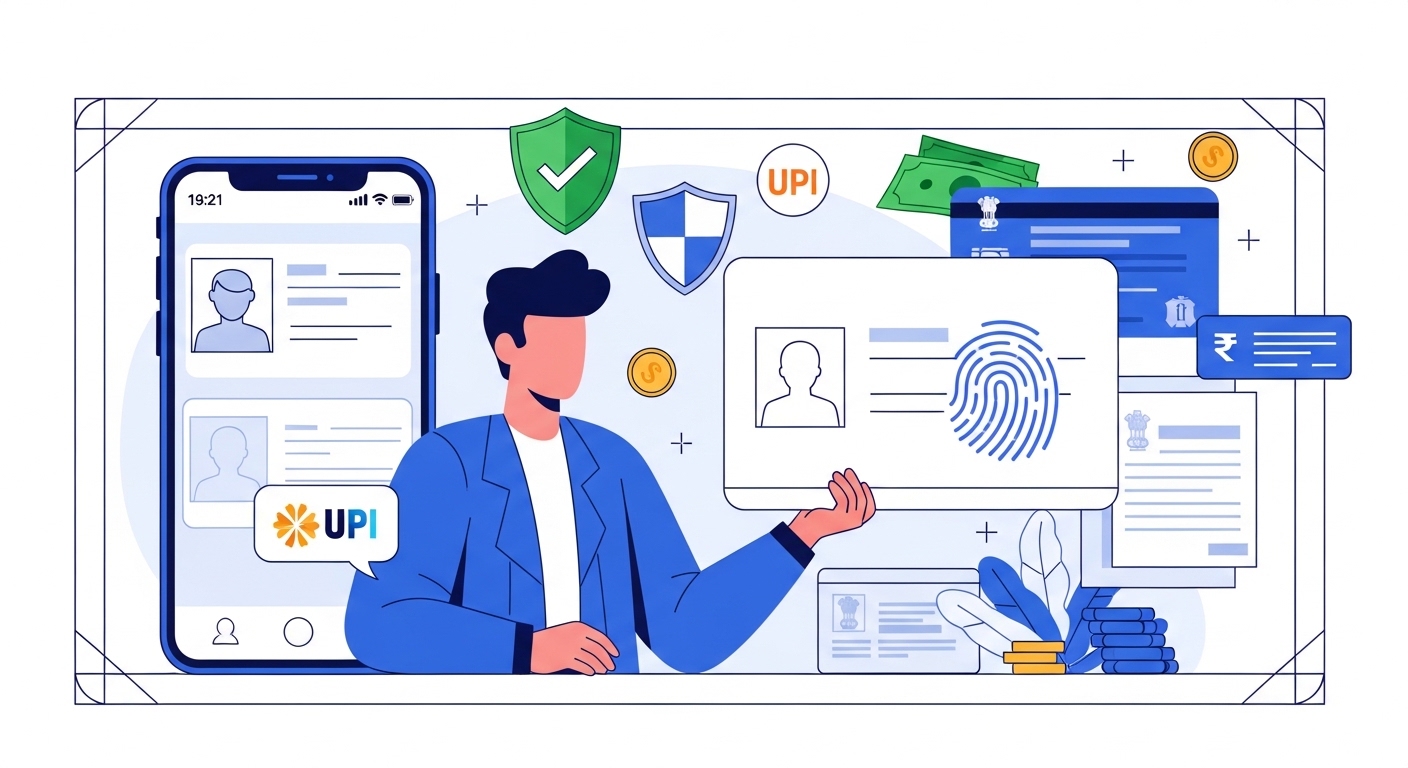
DBT Bank Account Seeding is the essential process of connecting your unique Aadhaar number to a specific bank account. This designates that account as the official recipient for government welfare schemes and subsidies. This mechanism, primarily facilitated by the Aadhaar Payment Bridge System (APBS) managed by the National Payments Corporation of India (NPCI), ensures funds are transferred directly and securely.
If your Aadhaar is not correctly seeded, crucial benefits such as LPG subsidies, scholarships, or pensions will not reach your designated account. This can lead to significant delays and financial inconvenience for you. The system is designed to enhance transparency and reduce leakages in government welfare programmes.
Quick Context: DBT in Your Life
Think of DBT as a digital pipeline from the government directly to your bank account. If you receive an LPG subsidy, a scholarship, or a pension, these funds often come via DBT, requiring your Aadhaar to be linked.
For many individuals, managing monthly finances involves various government benefits or subsidies that supplement income. Direct Benefit Transfer is the government’s method of ensuring these funds reach you efficiently and transparently. It removes intermediaries, sending money straight from the government to your bank account, reducing fraud and delays.
- Common DBT Schemes Requiring Aadhaar Seeding
- LPG Subsidies: Direct cash transfers for cooking gas.
- Scholarships: Educational grants for students.
- Pensions: Various government pension schemes for monthly disbursements.
- MGNREGA Wages: Payments for rural employment schemes.
- PM-KISAN Payments: Income support for farmers.
Why Is Aadhaar Linking Important?
You might wonder why another linking step is necessary when you already possess a bank account and an Aadhaar card. The importance lies in the government’s commitment to precision and preventing the misuse of public funds. Aadhaar acts as a universal identifier, ensuring that benefits are disbursed only to the rightful individual.
This system eliminates duplication and ensures that each person receives only their entitled share, bolstering the integrity of welfare schemes. For you, this means peace of mind, knowing your benefits are secure and directed specifically to you. It also safeguards against common errors and fraudulent claims.
Common Confusion: Myth vs. Reality
Misconception: Having an Aadhaar number is enough to receive DBT payments. Correction: While possessing an Aadhaar is essential, you must actively link or “seed” it with your chosen bank account for DBT funds to be directed there.
The primary reason for Aadhaar linking is to guarantee that payments reach the correct individual. Your Aadhaar number is unique, making it an ideal tool for authenticating your identity for various government services. When your Aadhaar is linked to your bank account, it creates an unforgeable digital trail for every DBT transaction.
This strong identification system minimises the chances of funds being mistakenly credited to someone else’s account or being intercepted by fraudsters. It forms a fundamental layer of security for your financial benefits, ensuring accuracy in every transfer. This process helps maintain the integrity of public spending.
- Consequences of Unlinked Aadhaar for DBT
- Funds Held Up: Payments can remain in a limbo state, not credited to any account.
- Rejection of Benefits: Your application for a scheme might be rejected.
- Incorrect Account Credit: Funds could mistakenly go to an old or inactive account.
- Manual Intervention: You might need to visit bank branches multiple times to resolve issues.
Benefits of Correct Aadhaar Seeding
Correctly linking your Aadhaar to your bank account offers several tangible advantages, especially for individuals who rely on various government schemes. It is not merely a bureaucratic requirement; it is a pathway to smoother, more secure, and more reliable financial interactions with the government. These benefits translate into better financial planning and reduced administrative hassle for you.
You will find that once your Aadhaar is properly seeded, the process of receiving benefits becomes almost invisible, operating smoothly in the background. This allows you to focus on your professional and personal life without worrying about the status of your government entitlements. It is an investment in your financial peace of mind.
Pro Tip: Verify Account Details
Actionable tip: Regularly verify your bank account details, especially the account linked for DBT. Small errors in IFSC codes or account numbers can cause significant delays, even with a correctly seeded Aadhaar.
One of the most immediate benefits you will experience is the speed of fund transfers. With Aadhaar seeding, DBT payments are typically processed much faster, often credited within a few business days of disbursement. The APBS system is designed for high-volume, real-time processing, ensuring quick delivery.
This efficiency means you do not have to wait for cheques or endure lengthy manual processing times. The money arrives directly in your account, ready for use, which is invaluable for managing your monthly budget effectively. This direct credit system minimises any lag between the government’s release of funds and your receipt of them.
| Feature | Aadhaar Seeded Account | Aadhaar Unseeded Account |
| Benefit Receipt | Direct, Timely Credit | Potential Delays, Manual Intervention |
| Fraud Protection | High Security, Traceable | Higher Risk of Diversion |
| Scheme Access | Eligible for Most Schemes | May Be Ineligible for Many |
| Convenience | Automatic, Simple | Requires Follow-Up, Uncertainty |
Before you begin the process of linking your Aadhaar to your bank account, it is wise to gather all the necessary documents and information. This preparation will make the process much smoother and help you avoid common errors or delays. Think of it as preparing your workspace before starting an important project; having everything at hand saves time and reduces frustration.
Ensuring you have accurate and up-to-date details for both your Aadhaar and your bank account is paramount. A small discrepancy, like a misspelled name or an outdated mobile number, can halt the entire linking process. Taking a few moments to prepare now will save you considerable effort later.
What You Need Before Starting
Quick Context: Essential Checklist
Before you start, make sure you have your Aadhaar card (physical or e-Aadhaar), your bank passbook or statement, and your registered mobile phone ready. This will ensure a smooth process.
You will need your physical Aadhaar card or a printed copy of your e-Aadhaar. The 12-digit Aadhaar number is obviously critical, but also ensure that your name, date of birth, and address on the card match your bank records exactly. Even minor variations can cause issues with the linking process.
If there are any discrepancies, it is advisable to update your Aadhaar details first through the UIDAI portal or an Aadhaar Enrolment/Update Centre. This ensures consistency across all your official documents. Having a consistent record prevents unnecessary complications during seeding.
Required Documents and Information
- Aadhaar Card: Physical card or e-Aadhaar with your 12-digit number.
- Bank Account Number: The full account number of your chosen bank account.
- IFSC Code: The specific IFSC code for your bank branch.
- Registered Mobile Number: An active phone number linked to both your Aadhaar and your bank.
- Bank Passbook/Statement: For verification of details and account ownership.
- Key Features of APBS
- Centralised System: APBS acts as a single point for processing all Aadhaar-linked DBT payments.
- Aadhaar as Identifier: Uses your Aadhaar number instead of bank account details for routing funds.
- Interbank Transfers: Facilitates transfers between any two banks participating in the system.
- Real-time Processing: Designed for efficient and timely credit of benefits.
- Last Seeded Account: Automatically directs funds to the bank account most recently linked for DBT.
- Steps if Linking Fails
- Recheck all personal details: Ensure exact match between Aadhaar and bank records.
- Contact your bank: Explain the issue and provide any reference numbers.
- Update Aadhaar details: If discrepancies exist, update them via UIDAI portal or centre.
- Re-submit application: After correcting details or resolving issues, re-apply for seeding.
Checking Your Aadhaar Status
Before linking, it is a good practice to verify your Aadhaar’s authenticity and its current linkage status. This proactive step can save you from potential issues later on, ensuring that your Aadhaar is valid and ready for seeding. For a civil servant like Sanjay, this diligence means fewer interruptions to his financial routine.
You want to confirm that your Aadhaar details are correct and that it has not been linked to an unexpected account. This verification process is simple and can be completed online from the comfort of your home or office. It provides a clear picture of your Aadhaar’s current standing.
You can easily verify the authenticity of your Aadhaar number by visiting the official UIDAI website. This step confirms that your Aadhaar number is genuine and active, and it also allows you to check if your details are accurate. It is a quick way to rule out any issues with the card itself.
Step 1: Verify Aadhaar Authenticity
Step 2: Open your web browser and navigate to the official UIDAI website (uidai.gov.in).
Step 3: Look for the “Aadhaar Services” section and select “Verify an Aadhaar Number”.
Step 4: Enter your 12-digit Aadhaar number and the security captcha code shown on the screen.
Step 5: Click “Proceed to Verify”. You will see a message confirming your Aadhaar number’s existence and active status, along with your age band, state, and registered mobile number.
Verify Aadhaar Authenticity
Common Confusion: KYC vs. DBT Linkage
Misconception: If your bank account shows “Aadhaar linked” on your passbook, it is automatically ready for DBT. Correction: While your bank may have linked your Aadhaar for KYC purposes, you need to verify its APBS seeding status specifically through the UIDAI portal for DBT.
Once you have verified your Aadhaar’s authenticity, the next crucial step is to check its current bank linkage status. This tells you which bank account, if any, is currently receiving DBT payments through the APBS. It is especially important if you have previously linked your Aadhaar or have multiple accounts.
Step 1: Check Linkage Status Online
Step 2: Visit the official UIDAI website (uidai.gov.in) and find the “Check Aadhaar & Bank Account Linking Status” option.
Step 3: Enter your 12-digit Aadhaar number and the security captcha.
Step 4: Click “Send OTP”. A One-Time Password will be sent to your Aadhaar-registered mobile number.
Step 5: Enter the OTP and click “Submit”. The screen will then display your Aadhaar linking status, including the name of the bank it is linked to, the date of seeding, and the status (Active/Inactive).
Check Linkage Status Online
Understanding NPCI Mapper (APBS)
The National Payments Corporation of India (NPCI) plays a central role in the entire DBT ecosystem, particularly through its Aadhaar Payment Bridge System (APBS). As an individual receiving benefits, understanding this mechanism helps you appreciate why Aadhaar seeding is so critical. It is the technical backbone that ensures your government benefits are delivered accurately.
NPCI is an umbrella organisation for all retail payments in India, established by the Reserve Bank of India (RBI) and the Indian Banks’ Association (IBA). Its role in DBT is to provide the infrastructure that enables smooth, interbank Aadhaar-based transactions. They ensure the security and efficiency of the payment bridge.
Pro Tip: Re-seed New Accounts
Actionable tip: If you open a new bank account and want to receive DBT there, remember to re-seed your Aadhaar with the new account. This will update the NPCI mapper, directing future benefits to your preferred account.
Without NPCI’s APBS, the massive scale of DBT transactions across different banks would be impossible to manage effectively. They act as the central switch, routing funds to the correct beneficiary accounts based on their Aadhaar numbers. This centralisation prevents fragmentation and ensures consistency across the banking system.
The Aadhaar Payment Bridge System (APBS) is a unique payment system that uses your Aadhaar number as the financial address for receiving government subsidies and benefits. When a government department initiates a DBT payment, they send a file containing Aadhaar numbers and corresponding amounts to NPCI. NPCI then identifies the bank account linked to each Aadhaar number through its mapper.
Linking Aadhaar Through Your Bank Branch
While online methods offer convenience, visiting your bank branch remains a reliable way to link your Aadhaar. This method is particularly useful if you prefer in-person assistance, have complex account issues, or are uncomfortable with online processes. For many, the reassurance of speaking directly with a bank official is invaluable.
The branch process ensures that all your details are correctly captured and verified by bank staff. It is a simple procedure, but requires you to physically visit the branch where you hold your account. Make sure to carry all necessary documents to avoid multiple trips.
Quick Context: Branch Visit Essentials
When visiting your bank, carry your original Aadhaar card, a self-attested photocopy, your bank passbook, and a pen. This ensures you are prepared for the application process.
You will need to obtain and fill out the Aadhaar Seeding Application Form at your bank branch. This form typically asks for your bank account number, your Aadhaar number, and your consent to link them for DBT purposes. Read the form carefully before signing to ensure you understand the terms.
Most banks have a dedicated counter or representative for Aadhaar-related services. Do not hesitate to ask for clarification if any part of the form is unclear. Ensuring the form is accurately completed is the first critical step in the process.
Step 1: Visit your bank branch where you hold the account you wish to link.
Step 2: Request the Aadhaar Seeding Application Form from a bank official.
Step 3: Fill out the form completely and accurately, providing your bank account and Aadhaar details.
Step 4: Attach a self-attested photocopy of your Aadhaar card and submit it to the bank official.
Step 5: Collect the acknowledgment slip or receipt for your records.
Visit your bank branch where you hold the account you wish to link.
Linking Aadhaar Using Online Banking
For individuals who prefer managing their finances digitally, linking Aadhaar through online banking is a convenient and efficient option. Many banks now offer this service directly through their net banking portals, allowing you to complete the process from your computer or smartphone. This method saves you a trip to the branch and can be done at any time.
It is important to use only the official website of your bank and ensure your internet connection is secure. Online linking typically involves a few simple steps, often verified with an OTP sent to your registered mobile number. This digital approach aligns perfectly with modern financial management.
Begin by logging into your bank’s official net banking portal using your user ID and password. Always double-check the URL to ensure you are on the legitimate website and not a phishing site. Look for security indicators like “https://” and a padlock icon in your browser’s address bar.
Common Confusion: Instant Linkage Myth
Misconception: Once you enter your Aadhaar number online, it is instantly linked to your account. Correction: Online linking usually involves a verification process, such as an OTP, and the actual seeding with NPCI can take a few business days to reflect.
Once logged in, your bank’s dashboard will usually display various service options. Navigating this secure environment is the first step towards digitally linking your Aadhaar. Protect your login credentials diligently to prevent unauthorised access.
Step 1: Log in to your bank’s official net banking portal using your credentials.
Step 2: Navigate to the “Aadhaar Seeding” or “Update Aadhaar” section, usually found under ‘Services’ or ‘Requests’.
Step 3: Enter your 12-digit Aadhaar number in the designated field.
Step 4: Confirm your Aadhaar number and submit the request.
Step 5: Enter the One-Time Password (OTP) sent to your Aadhaar-registered mobile number to complete the verification.
Log in to your bank’s official net banking portal using your credentials.
Linking Aadhaar Via ATM or Kiosk
For those who prefer self-service options without needing internet banking or visiting a branch during working hours, some banks offer Aadhaar linking through their ATMs or dedicated kiosks. This method provides flexibility and accessibility, allowing you to complete the process at your convenience. It is a quick alternative for simple transactions.
While not all banks provide this specific service at every ATM, it is worth checking if your bank supports it. This method is typically simple, guiding you through the steps on the screen. It is an excellent option for quick updates.
Pro Tip: ATM Privacy
Actionable tip: When using an ATM for Aadhaar linking, ensure privacy by covering the keypad as you enter your PIN and Aadhaar number. Always collect your card and receipt before leaving the machine.
At the ATM, insert your debit card and enter your PIN as usual. On the main menu screen, look for options like “Services,” “Registrations,” or “Aadhaar Seeding.” The exact menu path might vary slightly depending on your bank’s ATM interface.
Carefully select the Aadhaar Seeding option to proceed with the linking process. This choice will direct you to the specific functionality required for connecting your Aadhaar to your bank account.
Step 1: Insert your debit card into the ATM and enter your PIN.
Step 2: From the main menu, select “Services” or “Registrations,” then choose “Aadhaar Seeding.”
Step 3: Enter your 12-digit Aadhaar number when prompted on the screen.
Step 4: Confirm the Aadhaar number and select “Yes” or “Confirm” to submit your request.
Step 5: Collect the transaction slip as your acknowledgment.
Insert your debit card into the ATM and enter your PIN.
Linking Aadhaar Through Mobile Banking
Today, mobile banking apps have become indispensable for managing finances on the go. Many banks now offer the convenience of Aadhaar linking directly through their official mobile applications. This method provides maximum flexibility, allowing you to link your Aadhaar from anywhere, at any time, using your smartphone.
Using your bank’s official app ensures a secure environment for this sensitive transaction. It is a fast and user-friendly way to complete the seeding process, especially for tech-savvy individuals. Always download apps only from official app stores.
Ensure you are using your bank’s official mobile banking application, downloaded from a trusted source like the Google Play Store or Apple App Store. Avoid third-party apps or suspicious links. Log in to your app using your mobile banking credentials.
The app’s interface is designed for ease of use, with clear navigation to various services. Familiarising yourself with your bank’s app will make the Aadhaar linking process even smoother. Protect your mobile banking login details diligently.
Step 1: Open your bank’s official mobile banking app and log in securely.
Step 2: Navigate to the “Services” or “Aadhaar Linking” section within the app.
Step 3: Enter your 12-digit Aadhaar number in the specified field.
Step 4: Confirm your Aadhaar number and submit the request.
Step 5: Enter the OTP received on your Aadhaar-registered mobile number to verify and complete the linking process.
Open your bank’s official mobile banking app and log in securely.
How to Check Linkage Online
After you have submitted your Aadhaar linking request through any method, it is crucial to verify that the seeding has been successfully processed. This step ensures that your efforts have paid off and that your account is now ready to receive DBT payments. For a civil servant like Sanjay, this confirmation provides peace of mind and clarity.
The easiest and most reliable way to check your Aadhaar-bank account linkage status is through the official UIDAI website. This portal provides the definitive status of which bank account is currently mapped for DBT under your Aadhaar number. It is a quick and secure way to confirm your status.
Quick Context: Direct Linkage Check
The UIDAI portal is the definitive source for checking your Aadhaar-bank linkage status. It is the most reliable way to confirm which account is active for DBT.
To check your linkage status, you need to visit the official UIDAI website (uidai.gov.in). This is the authoritative source for all Aadhaar-related information and services. Ensure you are on the correct government portal to protect your personal data.
Once on the website, look for the section dedicated to Aadhaar services. This will lead you to the option for checking your bank account linking status. Trust only official government websites for such sensitive information.
Step 1: Go to the official UIDAI website (uidai.gov.in).
Step 2: Click on “Aadhaar Services” and then “Check Aadhaar & Bank Account Linking Status.”
Step 3: Enter your 12-digit Aadhaar number and the security captcha.
Step 4: Click “Send OTP” and enter the OTP received on your Aadhaar-registered mobile number.
Step 5: View the displayed status, which confirms your Aadhaar-bank linkage and the associated bank.
Go to the official UIDAI website (uidai.gov.in).
What if Linking Fails?
Sometimes, despite your best efforts, the Aadhaar linking process might not go as planned. This can be frustrating, especially when you are expecting important government benefits.
Do not worry; there are clear steps you can take to troubleshoot and resolve these issues. For an individual managing finances, addressing these failures promptly is key to maintaining financial stability.
Common reasons for failure include mismatched details, technical glitches, or processing delays. Understanding how to react to a failed linking attempt will save you time and ensure your benefits are secured. Persistence and accurate information are your best tools here.
Common Confusion: Immediate UIDAI Visit
Misconception: If your Aadhaar linking fails online, you must immediately visit a UIDAI centre to fix it. Correction: Most failures are due to bank-side issues or data mismatches, which your bank can help resolve first.
The most common reason for a failed linking attempt is incorrect or mismatched information. Go back and carefully verify that your name, date of birth, and address on your Aadhaar card exactly match the records held by your bank. Even minor spelling differences can cause a rejection.
Also, double-check your bank account number and IFSC code if you submitted them manually. Ensure that the mobile number registered with your Aadhaar is active and that you received the OTP correctly. A thorough review of all your submitted details is the first and most critical troubleshooting step.
Mismatched Name or Details
If your name, date of birth, or address on your Aadhaar card does not exactly match your bank records, the linking request will likely be rejected. Banks perform stringent checks to ensure identity consistency. Even a single letter difference can cause a mismatch.
Before re-applying, ensure your details are updated either at your bank or through the UIDAI portal/Aadhaar Enrolment Centre. For example, if Sanjay’s bank account has “Sanjay Kumar” but his Aadhaar says “Sanjay K.”, this could be a problem. Consistency is vital for successful seeding.
Multiple Bank Accounts Linked
The APBS system allows only one bank account to be actively seeded for DBT at any given time. If you have multiple bank accounts and have previously linked your Aadhaar to a different one, your new request might not override the old one automatically. This can lead to confusion about where benefits are being directed.
You need to explicitly designate your preferred account for DBT payments. You can visit your bank branch to submit a request to change your Aadhaar seeding to a different account. The bank will then update the NPCI mapper accordingly.
No Confirmation Received
After submitting your linking request, you should typically receive a confirmation message or acknowledgment from your bank or the UIDAI portal. If you do not receive any confirmation within a few business days, it is important to follow up. This lack of confirmation could indicate a processing issue or a failed submission.
Contact your bank’s customer service or visit the branch with your acknowledgment slip (if you have one) to inquire about the status. They can often provide more detailed information about why the request was not processed or if there was a technical glitch.
Conclusion
By following these steps, you’ve ensured your Aadhaar is correctly linked to your DBT bank account. This proper linkage guarantees you’ll seamlessly receive all your government benefits directly, without any hitches.