KYC (Know Your Customer) is mandatory for a few simple reasons. Firstly, it is required by law to prevent financial crimes like money laundering and fraud. By verifying customer identities and gathering necessary information, KYC ensures compliance with regulations. Secondly, it helps financial institutions assess the risk associated with a customer’s transactions, allowing them to identify and address potential risks.
Lastly, KYC enhances security by reducing the risk of identity theft and unauthorized account access. It also builds trust between financial institutions and customers by demonstrating commitment to due diligence and compliance.
Is KYC Mandatory for UPI Transfer in Paytm?
Full KYC is not mandatory for UPI transactions on Paytm. UPI works by directly linking your bank account to Paytm, so once your bank account is verified, you can start making payments without completing full KYC. This means you can enjoy all the essential UPI features such as:
Checking balances and viewing transaction history — Keep track of your spending and confirm incoming payments in real-time.
Sending and receiving money instantly — Transfer funds to friends, family, or merchants anytime without extra steps.
Scanning QR codes for payments — Make quick payments at shops, restaurants, and online platforms using Paytm’s QR scanner.
Accessing multiple UPI IDs — Manage more than one UPI ID within Paytm for added flexibility and convenience.
How to Set Up UPI Account on Paytm?
Step 1: Download and install the Paytm app on your smartphone.
Step 2: Open the app and sign in with your mobile number, then follow the prompts to set up your profile.
Step 3: Tap on your profile icon in the top left corner of the screen.
Step 4: Select ‘UPI & Payment Settings’ from the menu options.
Step 5: Select ‘Add bank account,’ pick your bank, and enter your account details. Don’t forget to set up your UPI PIN.
Step 6: You can add multiple bank accounts and select one as your default account for receiving money. Now you’re all set to use UPI on Paytm!
How to Make a UPI Transaction on Paytm?
Step 1: Open the Paytm mobile app on your phone and log in.
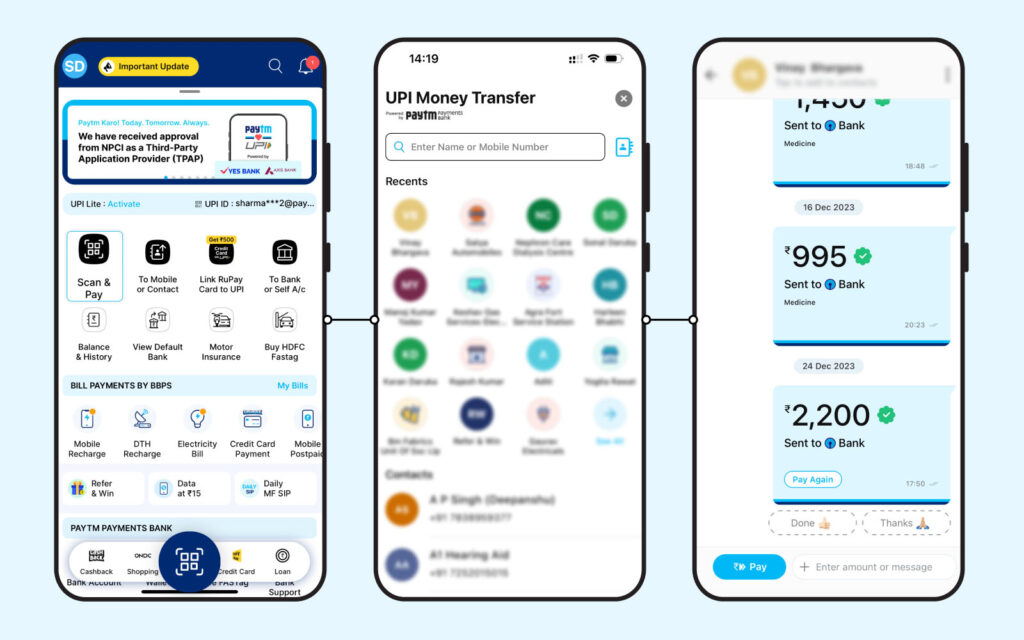
Step 2: Click on the “To Mobile or Contact” option.
Step 3: Enter the recipient’s mobile number or select their contact from your phone’s contact list.
Step 4: Alternatively, you can use the “Scan & Pay” option to send money by scanning the receiver’s QR code.
Step 5: Click the “Pay” button and enter the amount you want to transfer.
Step 6: Confirm the bank account you want to use for the transfer, which will be displayed above the “Pay” button.
Step 7: Enter your UPI PIN to complete the transaction.
Step 8: The amount will be transferred to the recipient within a few seconds.

Note: The steps involved in using UPI to transfer money may vary depending on the specific payment app you are using. It is recommended to follow the instructions provided within the app as the process can differ slightly between different applications. Pay attention to the on-screen prompts and guidance offered by the app to ensure a successful and secure money transfer using UPI.
Conclusion: KYC is mandatory for financial institutions to prevent financial crimes and enhance security. However, for UPI money transfers on Paytm, a separate KYC process is not required. Simply linking your bank account with Paytm is enough for verification.
Disclaimer: This blog aims to simplify processes for readers. However, it is important to note that some information and screenshots may be outdated as Paytm may change its user interface for improved usability. Readers are advised to cross-check the latest information on Paytm app for the most accurate and up-to-date instructions


