

Many people believe that digital wallet bill payments fail mostly due to issues with the biller’s system or the payment gateway. It’s a common thought that once you hit ‘pay’, any problem is out of your hands. However, the reality is often quite different, with many issues stemming from simple user-side errors or easily resolvable technical glitches.
This guide will clear up these misconceptions by showing you exactly how to troubleshoot common problems with your digital wallet bill payments. You’ll learn the practical steps to take when payments don’t go through, money is debited but not credited, or your app isn’t working as it should. Understanding these fixes can save you time and stress, making your digital payment experience smoother in 2026.
Table of Contents
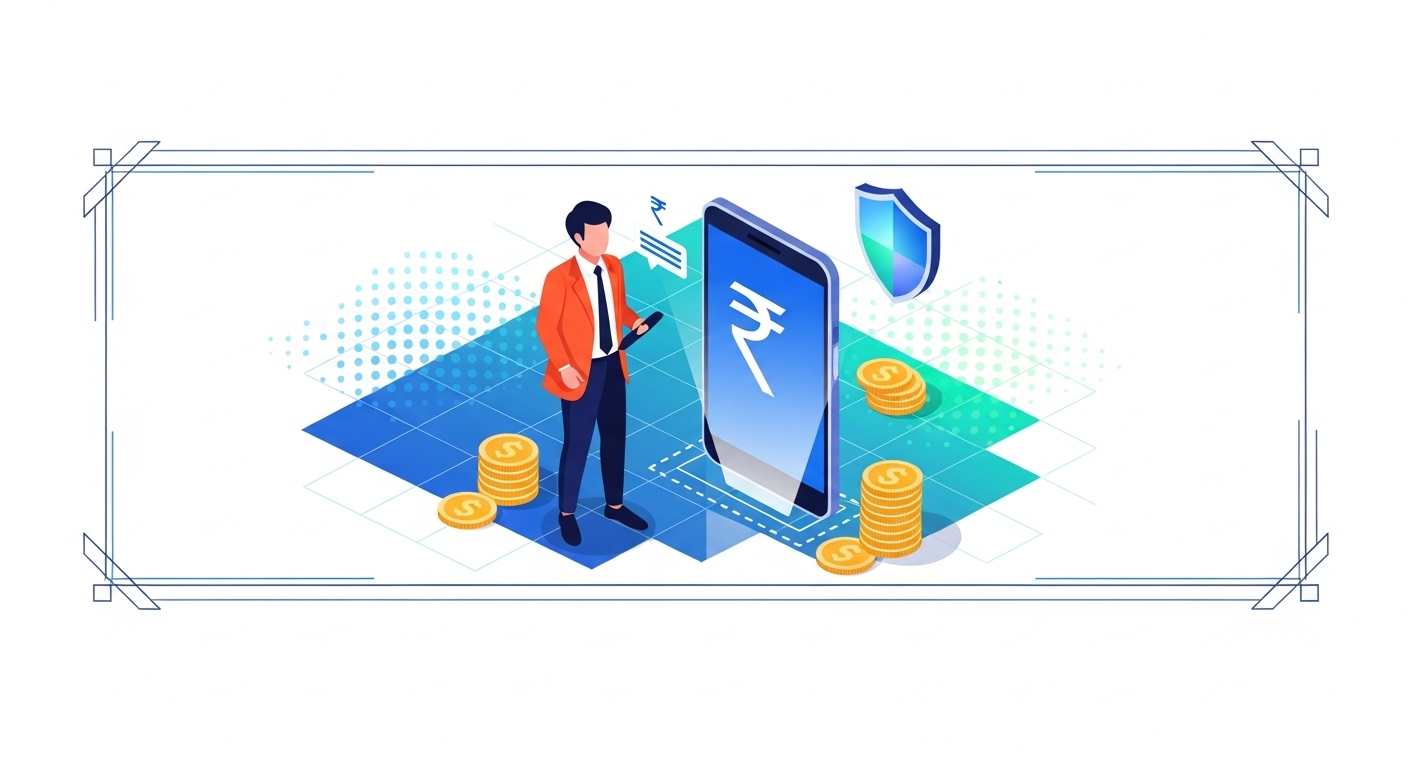
What Is Digital Wallet Bill Payment?
Digital wallet bill payment refers to the process of settling your utility bills, recharges, and other recurring expenses using a mobile application linked to your bank account or a prepaid balance. This system is largely governed by the National Payments Corporation of India (NPCI) through platforms like the bill payment system, ensuring a standardised and secure experience for millions. When you initiate a payment, your digital wallet acts as an intermediary, sending the funds via secure channels like UPI or IMPS to the biller.
A key benefit is the instant confirmation and a digital record of all transactions, which is crucial for financial tracking. If a payment fails or remains pending, the NPCI guidelines often mandate an automatic reversal of funds within one business day (T+1), though this can vary depending on the specific payment method and bank.
Not addressing payment issues promptly can lead to late fees or service disconnections, so it’s vital to act quickly. You can typically find support and track your payment status directly within your digital wallet app or by visiting the official the bill payment system portal.
Understanding Your Digital Wallet for Bills
Digital wallet apps simplify bill payments, but it’s important to understand their core functions. They offer a secure and efficient way to manage your recurring expenses. These platforms have become indispensable for millions across India, streamlining financial tasks.
You’re not paying bills; you’re gaining control over your finances with instant open to payment history and reminders. This shift from traditional methods offers both convenience and enhanced security. It’s a modern approach to managing your household expenses.
What digital wallets do
Digital wallets are virtual purses on your phone, letting you pay for many services without needing physical cash or cards. You can store money or link them directly to your bank account for instant payments, making bill payments, recharges, and transfers simple. These apps connect to various service providers, allowing you to pay electricity, water, gas, and insurance premiums from one place.
The Bharat Bill Payment System (the bill payment system), managed by NPCI, ensures these payments are processed securely across different billers. This centralisation makes managing your monthly expenses incredibly convenient and reliable.
Paying your bills easily
Paying bills through your digital wallet is a simple process, designed for speed and convenience. You select the biller, enter your consumer ID, and the outstanding amount appears for review. After confirming details, you authorise the payment using your PIN or biometrics.
The entire process usually takes less than a minute, saving you trips to physical payment centres or waiting in queues. Many wallets also offer bill reminders, helping you avoid late fees.
Why use a digital wallet
Using a digital wallet for your bills offers several clear advantages over traditional payment methods. Firstly, it provides unparalleled convenience, allowing you to pay anytime, anywhere, directly from your mobile. You don’t need to carry exact change or worry about bank holidays.
Secondly, digital transactions offer a detailed record of all your payments, which is excellent for budgeting and resolving any disputes. According to the Digital Payment Dashboard (2026), digital transactions continue to grow significantly, showing how much people trust and rely on these systems.
Common Confusion: Digital Wallet Scope
The misunderstanding here is that digital wallets are only for small, everyday purchases.
Digital wallets are fully integrated with the Bharat Bill Payment System (the bill payment system) and can handle significant utility bills, insurance premiums, and even loan EMIs securely, as per NPCI guidelines.
Benefits of Using Digital Wallets for Bill Payments:
- Convenience: Pay bills 24/7 from anywhere.
- Speed: Transactions are processed almost instantly.
- Record Keeping: All payments are digitally logged for easy tracking.
- Security: Secure encryption and authentication protect your financial details.
- Reminders: Get alerts for upcoming bill due dates.
Your Payment Did Not Go Through
It’s frustrating when you try to pay a bill and the transaction doesn’t complete successfully. Often, the cause isn’t a major system failure but rather a minor issue you can quickly resolve yourself. Knowing what to check first can save you from unnecessary worry and contacting customer support.
You’ll usually see an immediate notification in your app if a payment fails or is pending. Don’t panic; most digital wallet apps are designed with strong error handling and clear messaging to guide you.
Check your internet connection
A weak or unstable internet connection is one of the most common reasons for failed digital payments. Your wallet app needs a strong signal to communicate with the bank and the biller’s system. If the connection drops mid-transaction, the payment might not go through.
Step 1: Check your Wi-Fi or mobile data signal strength on your device.
Step 2: Try switching between Wi-Fi and mobile data to see if that improves connectivity.
Step 3: If possible, move to an area with better network coverage or restart your router. After ensuring a stable connection, you can try the payment again.
Look at your wallet balance
Sometimes, the simplest reason for a failed payment is insufficient funds in your linked account or digital wallet. The system will automatically decline a transaction if the amount exceeds your available balance. Always confirm you have enough money before attempting a payment.
Step 1: Open your digital wallet app and manage to your balance or linked account section.
Step 2: Verify that your available balance is equal to or greater than the bill amount you’re trying to pay.
Step 3: If funds are low, add money to your wallet or ensure your linked bank account has sufficient balance, then retry the payment.
See bank alerts
Your bank might decline a transaction for various security reasons, even if you have enough funds. This could be due to daily transaction limits, suspicious activity flags, or temporary technical issues on the bank’s side. Always check for any SMS or email alerts from your bank.
Your bank might send an instant notification explaining why a transaction was blocked or failed. If you receive such an alert, follow any instructions provided by your bank to resolve the issue.
Review transaction history
Checking your transaction history within the digital wallet app can provide crucial clues about what went wrong. It will show you the status of your recent payment attempts, whether “Failed,” “Pending,” or “Successful.” This log helps you confirm if the payment was actually initiated.
Step 1: open the “History” or “Transactions” section of your digital wallet app.
Step 2: Locate the specific bill payment you attempted and note its status.
Step 3: If it shows “Failed,” review any error messages provided. If “Pending,” give it some time, as it might still be processing.
Pro Tip: Quick Check for Payment Issues
Before contacting support, always check your internet, wallet balance, bank alerts, and transaction history. These four steps resolve most common payment failures.
What If Money Was Taken But Bill Not Paid?
One of the most concerning situations is when your bank account shows a debit, but the biller confirms they haven’t received your payment. This typically happens when a transaction gets stuck midway between your bank and the biller’s system. It’s important to understand that such issues are usually temporary and have defined resolution processes.
The digital payment infrastructure, including UPI and the bill payment system, is designed with strong reconciliation mechanisms to handle these discrepancies. Your funds are not lost; they are in transit or awaiting a final status update.
Wait a short while
Even though digital payments are often instant, sometimes there can be a slight delay in system updates, especially during peak hours. Your bank might have debited the amount, but the biller’s system might take a few minutes or even a couple of hours to reflect the credit. It’s always wise to allow some time for the transaction to complete its cycle.
According to NPCI guidelines (2026), for UPI transactions where funds are debited but not credited, an automatic reversal is typically initiated within one business day (T+1). This means you might see the money back in your account without taking any action.
Check biller’s payment status
While your wallet app might show a “pending” or “successful” status, it’s crucial to verify the payment directly with the biller. Their official portal or customer service can confirm if the payment has registered on their end. This step helps you understand if the issue lies with the payment gateway or the biller’s reconciliation process.
Step 1: Visit the official website or app of your biller (e.g., electricity board, gas company).
Step 2: Log in to your account or use the “Check Payment Status” option with your consumer ID.
Step 3: Look for the payment against your latest bill. If it’s not updated after a reasonable waiting period, proceed to contact your wallet provider.
Contact your wallet provider
If your funds haven’t been reversed and the biller confirms non-receipt after waiting, your digital wallet provider is the next point of contact. They have the tools and open to track the transaction ID and investigate the payment status with the banks involved. Provide them with all relevant details to speed up the resolution.
When you contact them, have your transaction ID, the amount, date, and biller details ready. They can initiate a formal dispute resolution process with the acquiring and issuing banks.
Understand refund times
Refund timelines are typically governed by official guidelines, and it’s good to know what to expect. For failed or stuck transactions, funds are usually reversed automatically within a specific timeframe. According to NPCI (2026), if a UPI transaction fails but the amount is debited, an auto-reversal is expected within 1 business day (T+1).
If the automatic reversal doesn’t happen within three business days, you should formally raise a dispute. Your digital wallet provider will then follow up with the banks involved to ensure the funds are returned.
Common Confusion: Funds Not Lost
It is commonly assumed that money debited but not credited means your funds are permanently lost.
This is incorrect; funds are rarely lost in digital payment systems. They are usually held in an intermediate state and are either credited to the biller or automatically reversed to your account within defined timelines, as per NPCI guidelines.
You Received a Failed Transaction Message
A “transaction failed” message is usually quite clear, indicating that the payment did not go through and no money was debited from your account. This is often less concerning than a “money debited but bill not paid” scenario, as your funds are safe. However, it still means your bill remains unpaid.
These failures often stem from small errors in the details you entered or temporary system glitches. Addressing these common pitfalls quickly can help you complete your payment without further delay.
Double-check biller details
One of the most frequent causes of failed transactions is incorrect biller details. This could be a wrong consumer ID, an incorrect account number, or even selecting the wrong biller type. The system won’t be able to match your payment to the correct bill, causing it to fail.
Step 1: Carefully review the consumer ID, account number, or unique biller identifier you entered in your digital wallet app.
Step 2: Compare it against your physical bill or the details provided by your service provider.
Step 3: Ensure you’ve selected the exact biller category. Correct any errors before attempting the payment again.
Ensure correct payment amount
Entering an incorrect payment amount can also lead to a failed transaction. Some billers might not accept partial payments, or your wallet might have a minimum transaction limit. Always verify that the amount you’re trying to pay matches the outstanding balance on your bill.
It’s also possible that you typed an extra digit or missed one, leading to an invalid amount. Double-check the figures before confirming the payment.
Try again later
Sometimes, a transaction might fail due to temporary network congestion, server issues on the biller’s side, or a momentary glitch in the payment gateway. These are usually short-lived problems that resolve themselves quickly. Waiting a few minutes and trying again can often be effective.
If your first attempt fails, don’t keep trying repeatedly within seconds. Give it 5-as per the latest official guidelines, especially during peak payment hours like month-end or festive seasons.
Pro Tip: Persistent Failed Transactions
If a transaction consistently fails despite checking details and trying again, consider using a different payment method within your digital wallet, such as switching from UPI to a debit card, or vice-versa. This can bypass temporary bottlenecks.
You Cannot Log In to Your Wallet
Being unable to log in to your digital wallet app can be incredibly frustrating, especially when you need to make an urgent bill payment. This problem often points to issues with your credentials, the app itself, or your device settings. Most login problems have simple solutions that don’t require external help.
Your digital wallet holds sensitive financial information, so security measures are strong. This means that even minor discrepancies in your login attempts can trigger temporary blocks or require verification steps.
Reset your password
Forgetting your password is a very common reason for login failures. Instead of repeatedly trying incorrect passwords, which might temporarily lock your account, it’s better to initiate a password reset immediately. This process is designed to be secure and guides you through verification.
Step 1: On the login screen, look for a “Forgot Password” or “Reset Password” option.
Step 2: Follow the prompts, which typically involve verifying your identity via your registered mobile number or email. You might receive an OTP.
Step 3: Create a new, strong password. Make sure it’s unique and not easily guessable, combining letters, numbers, and symbols.
Check for app updates
Outdated app versions can sometimes cause login problems or other functional glitches. Developers regularly release updates to fix bugs, improve security, and add new features. If you’re using an old version, it might not be compatible with the latest system requirements.
Visit your device’s app store (Google Play Store for Android or Apple App Store for iOS) and search for your digital wallet app. If an update is available, download and install it. After updating, try logging in again.
Clear app cache
Over time, apps store temporary data called “cache” to load faster. However, if this cache becomes corrupted, it can interfere with the app’s performance, including login functionality. Clearing the cache can often resolve these types of issues without deleting your actual app data.
Step 1: For Android users, go to your phone’s “Settings,” then “Apps” or “Applications,” find your digital wallet app, and select “Storage.”
Step 2: Tap on “Clear Cache.” Do NOT tap “Clear Data” unless instructed by customer support, as this might delete your app settings and logged-in sessions.
Step 3: For iOS users, you might need to offload the app or reinstall it if clearing cache isn’t an option. Restart the app and try to log in.
Quick Context: App Cache vs. App Data
Clearing app cache removes temporary files that can sometimes cause glitches, while clearing app data resets the app to its original state, deleting all user settings and login information. Always clear cache first.
Your Account is Blocked or Frozen
Discovering your digital wallet account is blocked or frozen can be alarming, as it immediately prevents you from making any transactions. This action is almost always a security measure taken by your provider to protect your funds and personal information. It usually indicates a potential security breach, suspicious activity, or a failure in identity verification.
While inconvenient, these measures are in place for your safety and comply with regulatory requirements from bodies like RBI and NPCI. Your provider is obligated to protect you from fraud and ensure the integrity of the digital payment ecosystem.
Understand security reasons
Accounts are typically blocked for reasons like multiple incorrect password attempts, unusual transaction patterns, or if your provider detects open from an unfamiliar device or location. These are flags that suggest someone other than you might be trying to open your account. Additionally, non-compliance with KYC (Know Your Customer) norms can lead to account restrictions.
Your provider might also freeze an account if they suspect it’s being used for fraudulent activities or if there’s a legal directive. These are serious situations, and the provider acts swiftly to prevent further misuse.
Contact customer support team
If your account is blocked, the first and most important step is to immediately contact your digital wallet’s official customer support team. Do not try to resolve it through unofficial channels or by repeatedly attempting to log in. They are the only ones who can investigate the reason for the block and guide you through the unblocking process.
When you call, explain the situation clearly and be ready to provide your registered mobile number and any other identifying information. They will initiate a verification process to confirm your identity.
Provide verification documents
To unblock your account, your provider will almost require you to verify your identity. This is a standard procedure to ensure that only the legitimate account holder regains open. You might be asked to provide copies of official identification documents.
Common documents requested include your Aadhaar card, PAN card, or passport. You might also need to provide a selfie or a video KYC as per the latest official guidelines for digital identity verification, ensuring compliance with eSign and India Stack frameworks.
Common Confusion: Blocked Account Funds
A widespread myth is that a blocked account means your money is gone for good.
Your funds are safe and secure within a blocked account; the block only prevents transactions. Once your identity is verified and the security concern is addressed, you will regain full open to your balance.
The App is Slow or Crashing
A digital wallet app that is constantly slow, freezing, or crashing can make bill payments nearly impossible and incredibly frustrating. These performance issues often stem from your device’s resources, the app’s internal state, or software conflicts. Fortunately, most of these problems are easily fixable with basic troubleshooting steps.
You don’t need to be a tech expert to get your app running smoothly again. Simple actions can often resolve these glitches, allowing you to get back to managing your finances without interruption.
Restart your mobile device
like a computer, your mobile phone can benefit from a fresh start when apps misbehave. Restarting your device clears temporary memory, closes background processes that might be consuming resources, and can resolve minor software conflicts. This is often the quickest fix for a sluggish app.
turn your phone off completely, wait for about 30 seconds, and then turn it back on. Once your device has fully restarted, open your digital wallet app again and check if its performance has improved.
Update the wallet app
Outdated app versions can be a source of many problems, including crashes and slow performance. Developers continuously release updates to optimise app speed, fix bugs, and ensure compatibility with newer operating system versions. Running an old version can lead to instability.
Visit your phone’s app store and check for any available updates for your digital wallet app. Download and install them to ensure you have the latest, most stable version.
Reinstall the app
If restarting your device and updating the app don’t resolve the performance issues, a complete reinstallation might be necessary. This step removes any corrupted app files or persistent glitches that might be causing the problems. It gives the app a fresh start on your device.
Step 1: Before uninstalling, ensure you remember your login credentials, as you’ll need them to log in again.
Step 2: Uninstall the digital wallet app from your device.
Step 3: Go to your device’s app store, search for the app, and download it again. After installation, log in and verify if the performance issues are resolved.
Pro Tip: Keep Your Phone Clean
Regularly clear unnecessary files and apps from your phone to free up storage and RAM. This ensures your digital wallet app, and all other apps, have enough resources to run efficiently.
How to Keep Your Digital Wallet Safe
Protecting your digital wallet is as important as safeguarding your physical wallet, if not more so, given the ease of open to your funds. While digital payment systems are built with strong security features, your personal practices play a huge role in preventing fraud and unauthorised open. Taking proactive steps ensures your financial safety in 2026.
You are the first line of defence against potential threats. By adopting simple yet effective security habits, you can significantly reduce the risk of your account being compromised.
Use strong, unique passwords
Your password is the primary barrier protecting your digital wallet. Using a weak or easily guessable password, or reusing the same password across multiple accounts, makes you vulnerable to cyberattacks. A strong password is your first and most crucial defence.
- Create Complex Passwords: Use a mix of uppercase and lowercase letters, numbers, and special characters. Aim for at least 12 characters.
- Avoid Personal Information: Don’t use your name, birth date, or common words.
- Use a Password Manager: Consider a reputable password manager to generate and store unique, strong passwords for all your accounts.
Enable two-factor authentication
Two-factor authentication (2FA) adds an extra layer of security beyond your password. Even if someone manages to guess your password, they won’t be able to open your account without the second factor. This usually involves a code sent to your registered mobile number or email, or a biometric scan.
Always enable 2FA on your digital wallet app if it’s available. This significantly enhances your account’s security, making it much harder for unauthorised users to gain open.
Beware of online scams
Scammers constantly evolve their tactics to trick users into revealing their login credentials or OTPs. Be extremely cautious of unsolicited calls, SMS messages, or emails asking for your personal or financial details. Official entities like NPCI or your bank will never ask for your PIN or OTP.
Never click on suspicious links or download attachments from unknown senders. Always verify the sender’s identity before sharing any information.
Monitor all transactions
Regularly checking your transaction history is a simple yet effective way to spot any suspicious activity early. Make it a habit to review your digital wallet statements at least once a week. This allows you to quickly identify any transactions you don’t recognise.
If you notice any unfamiliar debits or credits, act immediately. Early detection of fraudulent activity can prevent further losses and speed up the resolution process.
Common Confusion: Digital Wallet Security
The belief is that digital wallets are inherently less secure than traditional banking – but this is incorrect.
Digital wallets use advanced encryption and multi-factor authentication, often exceeding the security of physical cards. As per India Stack principles, strong security is foundational to digital payment systems.
What to Do If You Suspect Fraud
Discovering that your digital wallet account might have been compromised or used fraudulently is a serious and urgent matter. Every second counts in such situations, as quick action can help limit potential losses and assist in recovering your funds. Knowing the precise steps to take can make a significant difference.
You need to act decisively to protect your financial interests and prevent further unauthorised transactions. The immediate priority is to secure your account and inform the relevant authorities.
Report it immediately
As soon as you suspect any fraudulent activity, your very first step must be to report it to your digital wallet provider. Most apps have an in-app option to report fraud or a dedicated helpline for such emergencies. The sooner you report, the higher the chance of blocking further transactions or initiating a quick reversal.
Provide them with all the details of the suspicious transaction, including the date, time, amount, and any reference numbers. Your provider can then temporarily block your account or card linked to the wallet to prevent further misuse.
Change your password
After reporting the incident, immediately change your digital wallet password. This prevents the fraudster from making any further transactions if they gained open through compromised credentials. Choose a new, strong, and unique password that you haven’t used anywhere else.
If you use the same password for other online accounts, change those too, especially for your email. This helps contain the breach and secures your other digital assets.
Inform your bank
If your digital wallet is linked to your bank account and funds have been debited, you must also inform your bank. They can place a hold on your account or monitor it for suspicious activity. The bank will also guide you on their specific procedures for reporting fraud and potential chargebacks.
Provide your bank with the transaction details and the complaint reference number from your digital wallet provider. This dual reporting ensures that both ends of the transaction are aware of the fraud. According to RBI guidelines (2026), timely reporting of unauthorised transactions is crucial for customer liability protection.
Quick Context: The 3-Step Fraud Response
If you suspect fraud: 1. Report to wallet provider. 2.
Change passwords. 3. Inform your bank.
Following these steps quickly is vital for protecting your funds.
When to Contact Customer Support
While many digital wallet issues can be resolved with simple troubleshooting, there are specific situations where contacting customer support becomes essential. Knowing when to escalate a problem saves you time and ensures that complex issues are handled by experts. Don’t hesitate to reach out if your efforts aren’t yielding results.
You shouldn’t feel obliged to spend hours trying to fix something that’s clearly beyond basic user troubleshooting. Your digital wallet provider has dedicated teams ready to assist with technical glitches, payment discrepancies, and security concerns.
For persistent problems
If you’ve tried all the basic troubleshooting steps-checking your internet, verifying balances, restarting your app, and even reinstalling-but the problem persists, it’s time to contact support. Persistent issues often indicate a deeper technical glitch that only the provider can resolve. Don’t let a recurring problem frustrate you unnecessarily.
This includes issues like repeated transaction failures, constant app crashes, or inability to log in despite correct credentials and resets. These are signs that the problem might be on the provider’s server side or a specific account-related issue.
For unresolved payments
When money has been debited from your account but the bill isn’t paid, and the automatic reversal hasn’t occurred within the expected timeframe (e.g., T+1 to T+3 business days as per NPCI for UPI), you must contact customer support. This is a critical scenario that requires their immediate attention to initiate a formal dispute. They will guide you through the process of filing a complaint.
You should also contact them if a refund for a failed transaction is taking longer than the communicated timeline. Keep all transaction IDs and communication records handy.
For security worries
Any suspicion of unauthorised open, fraudulent transactions, or a blocked account due to security reasons warrants an immediate call to customer support. These are not issues to be handled lightly or delayed. Your financial security is paramount, and providers have specific protocols for such situations.
Even if you’re unsure whether an activity is fraudulent, it’s always better to err on the side of caution and report your concerns. They can investigate the activity and take necessary steps to secure your account.
| Issue Type | When to Contact Support | What to Prepare |
| Repeated Transaction Failures | After basic troubleshooting | Transaction IDs, error messages |
| Money Debited, Bill Unpaid | After T+1/T+3 days for reversal | Transaction ID, bank statement, biller details |
| Account Blocked/Frozen | Immediately | Identity documents, reason for block (if known) |
| Suspicious Activity/Fraud | Immediately | Details of suspicious transactions |
| App Crashing/Slow (persistent) | After reinstalling app | Device model, app version, error description |
How to Get Help from Your Provider
Contacting customer support can sometimes feel daunting, but being prepared makes the process much smoother and more effective. Knowing what information to gather and how to clearly explain your issue can significantly speed up resolution times. You want to make it as easy as possible for the support agent to help you.
Effective communication is key when seeking assistance. By providing precise details and following their instructions, you ensure that your problem is understood and addressed promptly.
Find contact information
Before you contact support, make sure you’re using the official channels. Look for the “Help & Support” or “Contact Us” section within your digital wallet app, or visit their official website. Using unofficial numbers found online can expose you to scams.
Most providers offer multiple ways to get help, including phone numbers, email support, and in-app chat. Choose the method that best suits the urgency and complexity of your issue.
Prepare transaction details
When you contact support, having all relevant transaction details at hand is crucial. This information allows the support agent to quickly locate your specific transaction and understand its history. Without these details, they might not be able to assist you effectively.
- Transaction ID/Reference Number: This is unique to each payment and is the most important piece of information.
- Date and Time of Transaction: The exact time helps narrow down the search.
- Amount of Transaction: The precise rupee value.
- Biller Name and Consumer ID: Details of the service provider you were paying.
- Screenshot of Error Message: If you received one.
Explain your issue clearly
When you speak or chat with a support agent, clearly and concisely explain your problem. Start with the core issue, provide the prepared details, and describe the steps you’ve already taken to troubleshoot. Avoid emotional language, focusing purely on the facts.
For example, instead of saying “My payment failed again, it’s so annoying!”, say “My electricity bill payment for consumer ID [X] of ₹[Y] on [Date] at [Time] failed with error code [Z]. I’ve already checked my internet and balance.” This level of detail helps them diagnose the problem faster.
Common Confusion: User information for Support
It’s commonly believed that support can magically fix any issue without user enter.
Support teams rely heavily on the accurate information you provide; without it, their ability to diagnose and resolve your specific problem is severely limited.
Conclusion
Managing your digital wallet for bill payments in 2026 should be a smooth and convenient experience, not a source of stress. By understanding the common issues and knowing the precise steps to troubleshoot them, you can resolve most problems quickly and independently. This proactive approach ensures your bills are always paid on time, avoiding penalties and service interruptions.
Making it a habit to regularly check your transaction history and maintain strong security practices will help you to handle your digital finances with confidence. Should a complex issue arise, you’re now equipped with the knowledge to effectively communicate with customer support, ensuring a swift resolution. Embracing these practices makes digital payments truly simple.
Missed an EMI? Here’s What REALLY Happens (And How to Fix It Fast)
