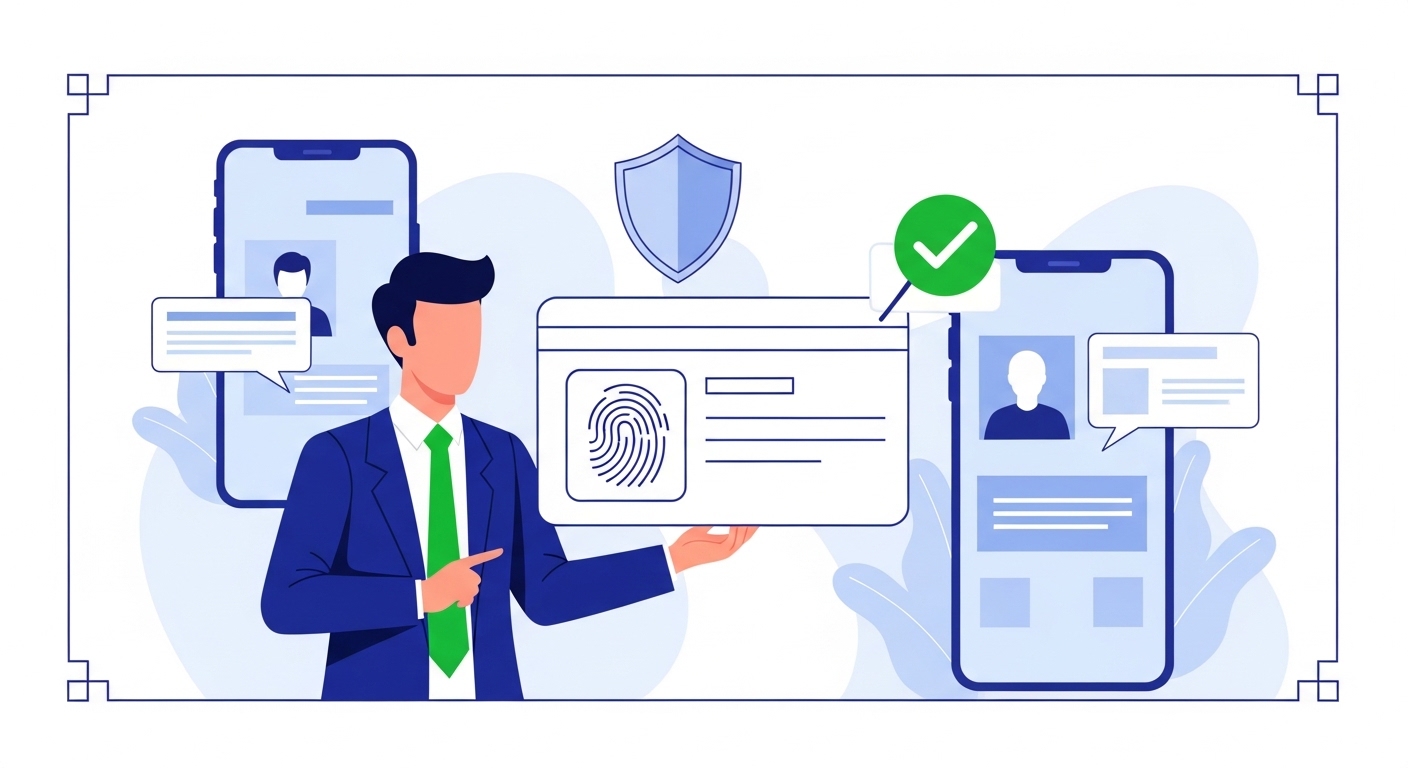
‘Aadhaar authentication failed. Error code 400.’ ‘What does that even mean?
I need to open my account!’ This frustration is common when you’re midway through a digital transaction and suddenly hit a wall. Understanding these specific Aadhaar error codes, which range from 100 to 999, is key to quickly solving the problem and continuing your important task.
This guide will help you decipher what each error code category signifies, from basic issues to biometric failures and demographic mismatches. You’ll learn the practical steps to troubleshoot and resolve these problems, ensuring your next Aadhaar-based transaction goes smoothly. We’ll focus on getting you unstuck and back on track.
Table of Contents
What Is Aadhaar Authentication?
Aadhaar authentication is the process of verifying your identity against the data held by the Unique Identification Authority of India (UIDAI) (2026). This happens by matching your submitted details, like your Aadhaar number and biometrics or OTP, with the central database. A
ccording to UIDAI (2026), over 1.4 billion Aadhaar numbers have been issued, making this verification a cornerstone of digital services. Failing to authenticate means you cannot open critical government services, financial transactions, or other digital platforms that rely on Aadhaar for identity proof. I
f you encounter an error, you’ll need to visit the official UIDAI Resident Portal to review your details or seek assistance.
Verifying your identity through Aadhaar is a fundamental step for countless digital services in India today. When you initiate a transaction requiring Aadhaar, the system sends your details to the UIDAI for a quick check. This ensures that the person attempting the transaction is genuinely you.
This verification is vital for preventing fraud and ensuring secure open to your accounts and services. It acts as a digital handshake, confirming your identity before any sensitive information or transactions proceed. Without successful authentication, the system cannot confirm who you are.
- Proof of Identity: Aadhaar provides a universally accepted digital identity.
- open to Services: It’s essential for banking, government subsidies, and digital payments like AePS.
- Security: Authentication prevents unauthorised open to your personal data and financial accounts.
Quick Context: Aadhaar Authentication API
Fintech companies and government agencies use the Aadhaar Authentication API (Application Programming Interface) provided by UIDAI (2026) to integrate real-time identity verification into their applications. This API allows their systems to securely send your Aadhaar details for validation and receive an instant response.
How Authentication Works
When you perform an Aadhaar authentication, you provide your Aadhaar number along with a factor like your fingerprint, iris scan, or a One-Time Password (OTP). This information is then sent to the UIDAI’s Central Identities Data Repository (CIDR). The CIDR checks if the provided information matches what they have on record for your Aadhaar number.
If the details match, the authentication is successful, and the service provider receives a ‘Yes’. If there’s a discrepancy, the authentication fails, and you receive an error code indicating the specific problem. This entire process typically happens within seconds.
Why Do Authentication Errors Happen?
Finding yourself stuck with an authentication error can be incredibly frustrating, especially when you’re in the middle of an urgent task. These errors aren’t random; they happen for specific reasons, often related to discrepancies between your submitted information and the UIDAI database. Understanding the root cause is the first step toward a quick resolution.
Common issues include incorrect data entry, problems with biometric capture, or a mobile number not being updated for OTP delivery. Each of these can lead to a failed authentication, halting your progress. It’s important to remember that these systems are designed for security, so even a small mismatch can trigger an error.
- Demographic Mismatch: Your name, date of birth, or address doesn’t match the UIDAI records.
- Biometric Failure: Fingerprint or iris scan quality is poor, or you’re using the wrong finger/eye.
- OTP Issues: Incorrect OTP entered, or the OTP isn’t delivered due to an outdated mobile number or network problems.
- Technical Glitches: Temporary system outages at UIDAI or the service provider.
- Aadhaar Status: Your Aadhaar might be inactive or temporarily suspended.
Common Confusion: Aadhaar Error Validity
A widespread myth is that Aadhaar authentication errors only happen if your Aadhaar is invalid.
This is incorrect; often, your Aadhaar is perfectly valid, but there’s a temporary mismatch in the data you’re providing or a technical issue preventing successful verification.
Impact of Failed Authentication
A failed authentication can immediately block you from completing your desired action. For instance, you won’t be able to open your bank account via AePS, submit an eSign document, or verify your identity for a new government service. This directly impacts your ability to manage your finances and open essential public services.
Beyond immediate inconvenience, repeated failed attempts might sometimes lead to temporary locking of your Aadhaar for security reasons. This is why understanding and resolving errors promptly is crucial. You want to avoid prolonged disruption to your digital activities.
Deciphering Aadhaar Error Codes (100-999)
Aadhaar authentication error codes are numerical messages, usually three digits, that provide specific clues about why your authentication failed. Think of them as diagnostic messages helping you pinpoint the exact problem. These codes are standardised across all services that use Aadhaar authentication.
These codes are grouped into categories, with each range indicating a particular type of issue. Knowing these categories helps you quickly narrow down the potential problem, whether it’s a data mismatch, a biometric issue, or a technical glitch. Your goal is to identify the code and then follow the recommended troubleshooting steps.
| Error Code Range | General Meaning | Common Examples |
| 100-199 | Basic Authentication Issues | Invalid Aadhaar number, authentication type not supported |
| 200-299 | Technical/System Errors | AADHAAR_SERVER_ERROR, invalid API key |
| 300-399 | Operator/Service Provider Errors | Invalid device, unauthorised transaction |
| 400-499 | Demographic Mismatch | Name, DOB, address mismatch |
| 500-599 | Biometric Failures (Fingerprint) | Fingerprint quality poor, no match found |
| 600-699 | Biometric Failures (Iris) | Iris quality poor, no match found |
| 700-799 | OTP/PIN Delivery Problems | Mobile number not registered, network issue |
| 800-899 | OTP/PIN Mismatch | Incorrect OTP entered, OTP expired |
| 900-999 | Other Specific Scenarios | Invalid request format, transaction not permitted |
What Each Code Means
Each specific code within these ranges points to a very particular problem. For example, a code like 401 might mean “Demographic data mismatch – Name”, while 500 could indicate “Biometric data mismatch – Fingerprint”. The more precisely you can identify the code, the faster you can find the solution.
The official UIDAI website is the definitive source for detailed explanations of each error code. You’ll want to cross-reference any error you receive with their published documentation. This ensures you’re applying the correct fix for your specific situation.
Pro Tip: Finding Official Information
Always refer to the official UIDAI website for the most accurate and up-to-date information on Aadhaar authentication error codes and their remedies. This prevents you from following outdated or incorrect advice.
Common Technical and System Errors
When you encounter error codes in the 100-399 range, they typically point towards technical issues rather than problems with your personal data. These could be anything from an invalid Aadhaar number format to a temporary server issue on the UIDAI side or within the service provider’s system. It’s not usually a reflection of your Aadhaar data being incorrect.
These errors often require you to wait a short while and try again, or to ensure you’re using a legitimate service provider. Don’t immediately assume your Aadhaar is at fault; consider external factors first. Checking your internet connection is always a good starting point.
Codes 100-199: Basic Issues
Codes like 100, 101, or 102 generally signify fundamental problems with the authentication request itself. This could be an invalid Aadhaar number format, meaning you’ve typed it incorrectly, or the authentication type requested (e.g., biometric) isn’t supported for your specific Aadhaar. Double-check the Aadhaar number you’ve entered very carefully.
Sometimes, it might also indicate that the service provider’s system is sending an unsupported authentication parameter. In such cases, the issue might be on their end. A simple re-entry or trying the transaction again after a few minutes can often resolve these basic errors.
Codes 200-299: System Problems
Errors in the 200-299 range, such as AADHAAR_SERVER_ERROR, point to issues with the UIDAI’s authentication server or the service provider’s connection to it. These are usually temporary glitches. You might encounter these if the system is undergoing maintenance or experiencing high traffic.
When you see these codes, it’s best to wait for some time, perhaps 30 minutes to an hour, and then attempt the authentication again. There’s little you can do on your end to fix a server problem, but patience is often rewarded. If the problem persists, contact the service provider.
Codes 300-399: Operator Errors
Codes in the 300-399 range often relate to issues with the device or application being used for authentication. This could mean an invalid authentication device is being used, or the service provider’s system itself isn’t properly configured. For example, if you’re using a public kiosk, the biometric scanner might not be properly registered.
If you’re using a mobile app, ensure it’s updated to the latest version. Sometimes, these errors also indicate that the transaction is not authorised by the service provider, suggesting an issue on their side rather than yours. Always verify you’re using an official and updated application.
Checking System Status
While UIDAI doesn’t always provide real-time public status updates for minor glitches, major outages are usually communicated. If you suspect a widespread system issue, a quick search for official announcements or checking the service provider’s social media can sometimes offer clues. However, for most individual errors, the problem lies elsewhere.
Pro Tip: Check Your Internet Connection
Before troubleshooting complex error codes, always ensure you have a stable and strong internet connection. A weak signal can interrupt the communication with the UIDAI servers, leading to authentication failures that appear as system errors.
Resolving Demographic Mismatch Errors
Error codes in the 400-499 range are among the most common and directly relate to discrepancies in your personal information. These happen when the name, date of birth, address, or gender you’re providing for authentication doesn’t exactly match the details stored in the UIDAI database for your Aadhaar number. Even a minor spelling difference or an incorrect initial can trigger these errors.
It’s crucial to understand that the authentication system performs an exact match. If your official name has a middle initial, but you’ve omitted it in the form, it will lead to a mismatch. These errors highlight the importance of keeping your Aadhaar details current and accurate.
Codes 400-499: Data Discrepancies
Specific codes like 401 (Name mismatch), 402 (DOB mismatch), 403 (Gender mismatch), and 404 (Address mismatch) clearly tell you which piece of demographic information is causing the problem. This precision is helpful because it directs your efforts immediately. You don’t have to guess what’s wrong; the code tells you.
These errors are particularly common if you’ve recently changed your name, moved house, or if there was an initial data entry error during your Aadhaar enrolment. Always ensure the details you enter exactly mirror what’s on your Aadhaar card or in the UIDAI records.
Name, Date of Birth Issues
For name mismatches, ensure you’re using your full name as it appears on your Aadhaar card, including any middle names or initials. Date of birth issues often arise from entering the year incorrectly or using a format different from your Aadhaar record. Always use the DD/MM/YYYY format if that’s what’s on your card.
If you have a partial or estimated date of birth on your Aadhaar, ensure you’re using that exact format. Any deviation will result in an error. These are often easy fixes if you know what information UIDAI has for you.
Address and Gender Mismatches
Address mismatches can occur if you’ve moved and haven’t updated your Aadhaar, or if there’s a slight difference in how your address is recorded. For gender, ensure you’ve selected the correct option as per your Aadhaar records. These details are fundamental for many services.
If you suspect any of these details are incorrect in the UIDAI database, or if they’ve changed, you’ll need to update your Aadhaar. This is a critical step to prevent future authentication failures.
Updating Your Aadhaar Details
If you identify a demographic mismatch, you must update your Aadhaar details through official channels. This process is simple and can often be done online for certain fields.
Step 1: Visit the official UIDAI Resident Portal and select “Update Aadhaar Details (Online)”.
Step 2: Log in using your Aadhaar number and the OTP sent to your registered mobile number; if your mobile number isn’t registered, you’ll need to visit an Aadhaar Enrolment Centre.
Step 3: Choose the demographic field you wish to update (e.g., Name, Date of Birth, Address) and upload the required supporting documents as per the official guidelines.
Step 4: Review your changes and submit the request; you’ll receive an Update Request Number (URN) to track the status of your update.
Step 5: Wait for the update to be processed, which typically takes a few days; once complete, you can download your updated e-Aadhaar.
Addressing Biometric Authentication Failures
Biometric authentication failures, indicated by error codes in the 500-699 range, occur when your fingerprint or iris scan doesn’t match the biometric data stored with UIDAI. This can be particularly frustrating as it often feels beyond your control. However, many common causes are easily addressed.
These errors are designed to protect your identity, ensuring that only you can use your biometrics for verification. Understanding *why* they fail helps you take corrective actions, rather than repeatedly trying.
Codes 500-599: Fingerprint Problems
Fingerprint-related errors (500-599) often arise from issues with the quality of the scan itself. This could be due to dirt or moisture on your fingers, cuts or abrasions, or even natural wear and tear on your fingerprints over time. The scanner might also be dirty or faulty.
Ensure your fingers are clean and dry, and press firmly and steadily on the scanner. Try different fingers if possible, especially if one finger has a visible mark. Sometimes, repositioning your finger slightly can make a difference.
Codes 600-699: Iris Scan Issues
Iris scan errors (600-699) are less common but can occur if there’s poor lighting, you’re wearing glasses or contact lenses that interfere with the scan, or if your eyes are watery or irritated. The iris scanner needs a clear view of your eye.
Remove glasses or contact lenses if possible, blink a few times to clear your eyes, and ensure you’re in a well-lit but not overly bright area. Keep your head steady and look directly into the scanner.
Causes of Biometric Failure
Beyond the immediate scanning conditions, your stored biometrics might have degraded over time due to age or manual labour. In some cases, the biometrics captured during enrolment might not have been of high quality. If you’ve tried all the immediate troubleshooting steps and still face persistent biometric errors, it might be time for an update.
- Poor Quality Scan: Dirt, moisture, or damage to fingers/eyes.
- Incorrect Placement: Not positioning your finger or eye correctly on the scanner.
- Degraded Biometrics: Natural changes to fingerprints or iris patterns over time.
- Scanner Issues: A dirty, faulty, or uncalibrated biometric device.
- Lighting Problems: Too much or too little light interfering with iris scans.
Tips for Successful Biometrics
Always clean the biometric scanner before use, if possible. Ensure your hands are clean and dry.
For fingerprint scans, try pressing gently but firmly and holding still for a few seconds. For iris scans, maintain a steady gaze and remove anything obstructing your eyes.
If you consistently face biometric authentication failures, especially with different devices, you might need to update your biometrics at an Aadhaar Enrolment Centre. This involves re-capturing your fingerprints and iris scans to ensure the UIDAI database has your most current data.
Troubleshooting OTP and PIN Errors
OTP (One-Time Password) and PIN errors, typically found in the 700-899 range, are often related to mobile number issues or incorrect entry. These are usually easier to resolve than biometric or demographic errors because they don’t involve physical presence or document updates. When you’re stuck, these errors usually mean the system can’t confirm it’s you via your phone.
The most common culprits are an outdated mobile number linked to your Aadhaar, network issues preventing OTP delivery, or entering the wrong six-digit code. Always double-check your registered mobile number first.
Codes 700-799: OTP Delivery Problems
Codes like 700 (Mobile number not registered), 701 (Mobile number not linked to Aadhaar), or 702 (Invalid mobile number format) indicate that the system cannot send an OTP to you. This is usually because the mobile number you’re trying to use is not the one registered with your Aadhaar, or your registered number is no longer active.
Network issues on your mobile service provider’s side can also prevent OTP delivery, even if your number is correct. Check for network signal, and ensure you haven’t blocked SMS from unknown senders.
Codes 800-899: Incorrect OTP/PIN
Error codes in the 800-899 range, such as 800 (Incorrect OTP) or 801 (OTP expired), mean that an OTP was successfully sent but the one you entered was either wrong or no longer valid. OTPs have a limited validity period, typically a few minutes, after which they expire for security reasons.
Always enter the most recent OTP you received. Avoid using older OTPs from previous attempts. If you’re struggling to type it correctly, ask someone to read it out for you.
Ensuring Correct Mobile Number
The most critical step for OTP-related errors is ensuring your current mobile number is linked to your Aadhaar. If it isn’t, or if you’ve changed your number, you must update it. This requires a visit to an Aadhaar Enrolment Centre, as mobile number updates cannot be done online for security reasons.
Once your mobile number is updated, you’ll receive OTPs reliably. This single action can prevent many future authentication headaches.
Steps for OTP Retries
If you’re facing OTP issues, try these steps before seeking further help. These are quick checks that often resolve the problem.
Step 1: Verify your registered mobile number by checking your Aadhaar card or logging into the UIDAI Resident Portal (if your old number is still active).
Step 2: Check your phone’s network signal strength and ensure you haven’t accidentally enabled ‘Do Not Disturb’ or blocked SMS from unknown numbers.
Step 3: Request a new OTP, making sure to wait for the previous one to expire or to receive the latest one before entering.
Step 4: Enter the OTP carefully, double-checking each digit; avoid rushing, as this often leads to errors.
Step 5: If the issue persists, try waiting 15-30 minutes before attempting again, as there might be a temporary network congestion.
Common Confusion: Mobile Number Update Myth
The misunderstanding here is that you can update your mobile number linked to Aadhaar online.
This is incorrect; for security reasons, you must visit an Aadhaar Enrolment Centre to update your mobile number.
Other Important Authentication Errors
Beyond the common categories, there are other important authentication errors, typically found in the 900-999 range. These codes cover specific scenarios that might not fit neatly into demographic, biometric, or OTP issues, but are equally important to understand for effective troubleshooting. They often relate to the structure of the request itself or specific policy restrictions.
These errors might be less frequent but can be as baffling if you don’t know what they mean. They usually require a more nuanced understanding of the authentication process or the service provider’s integration.
Codes 900-999: Specific Scenarios
Codes like 910 (Invalid request format), 930 (Transaction not permitted), or 998 (Expired authentication session) point to issues with how the authentication request was structured or specific policy limitations. An “Invalid request format” might mean the service provider’s system sent data in a way that UIDAI didn’t expect.
“Transaction not permitted” could mean that the particular service you’re trying to open isn’t authorised to perform that type of Aadhaar authentication. These often require communication with the service provider.
- Invalid Request Format: The data sent for authentication wasn’t structured correctly.
- Transaction Not Permitted: The service provider isn’t authorised for the specific authentication type.
- Expired Authentication Session: The time limit for completing the authentication process has passed.
- Aadhaar Suspended/Inactive: Your Aadhaar might be temporarily or permanently suspended.
Invalid Request Format
If you encounter an “Invalid request format” error, it’s highly likely that the issue lies with the service provider’s system rather than your Aadhaar. The application you’re using might be sending incomplete or malformed data to the UIDAI.
In such cases, contacting the service provider’s support is the best course of action. They might need to update their system or investigate a bug.
Transaction Not Permitted
A “Transaction not permitted” error means the specific authentication attempt you’re making is not allowed by the UIDAI for that particular service provider. For instance, some services might only be authorised for OTP-based authentication, not biometric.
This is a policy-level restriction. You might need to try a different authentication method or contact the service provider to understand their permitted Aadhaar services.
Expired Authentication Session
An “Expired authentication session” error occurs when you take too long to complete the authentication process. For security, most systems have a time limit (e.g., as per the latest official guidelines) within which you must enter your OTP or perform your biometric scan.
If you exceed this, the session expires, and you’ll need to start over. Be prompt when authenticating.
What Should You Do After an Error?
When an Aadhaar authentication error code appears, it’s easy to feel helpless, but there’s a clear path to resolution. Your immediate actions can significantly reduce the time it takes to get back on track. Don’t panic or repeatedly try the same action without understanding the error.
Reviewing the specific error code is your most important first step, as it tells you exactly where to focus your troubleshooting efforts. This systematic approach saves you time and frustration.
Step 1: Review the Error Code: Note down the exact three-digit error code displayed. This is your primary clue.
Step 2: Check the UIDAI Website: Visit the official UIDAI website and search for the specific error code to understand its official meaning and recommended solutions.
Step 3: Verify Your Aadhaar Details: Log into the UIDAI Resident Portal to check if your demographic details (name, DOB, address) are accurate and match what you’re providing.
Step 4: Ensure Mobile Number is Registered: Confirm that your current mobile number is registered with your Aadhaar, especially for OTP-based authentications.
Step 5: Contact Service Provider Support: If the error persists after basic troubleshooting, or if it seems to be a system/operator error (codes 200-399, 900-999), contact the customer support of the service you’re trying to use.
Step 6: Try Again Later: For temporary technical glitches, waiting a while (e.g., 30 minutes to a few hours) and trying again can often resolve the issue without further action.
Contact Support Channels
When contacting support, whether it’s the service provider or UIDAI, always have your Aadhaar number and the specific error code ready. This information allows them to quickly understand your situation and provide relevant assistance. Being prepared helps expedite the resolution process.
Preventing Future Aadhaar Authentication Errors
Proactive measures can significantly reduce the likelihood of encountering Aadhaar authentication errors in the future. Maintaining accurate and up-to-date information is your best defence against most common issues. Think of it as keeping your digital identity in good working order.
These practices ensure that your Aadhaar is always ready for verification, whether for financial transactions or government services. A little effort now can save you a lot of hassle later.
- Keep Your Aadhaar Updated: Regularly verify your demographic details (name, DOB, address, mobile number) on the UIDAI Resident Portal and update them immediately if there are any changes.
- Maintain Biometric Quality: If you frequently face biometric issues, consider updating your biometrics at an Aadhaar Enrolment Centre. Keep your fingers and the scanner clean during use.
- Secure Your Mobile Number: Ensure your registered mobile number is active and secure, as it’s crucial for OTP-based authentication. Report any loss or change promptly.
- Be Aware of Best Practices: Always use official apps and websites for Aadhaar-based services. Avoid public Wi-Fi for sensitive transactions.
Keep Your Aadhaar Updated
According to UIDAI (2026) guidelines, it’s recommended to update your demographic details whenever there’s a change, such as moving to a new address. For children, biometric updates are typically required at ages 5 and 15 to ensure accuracy. Keeping your Aadhaar current is your primary defence against mismatch errors.
Maintain Biometric Quality
Regularly cleaning biometric scanners and ensuring your hands are clean and dry before scanning can drastically improve success rates. If your biometrics have naturally changed over time, especially due to age or occupation, consider getting them re-captured at an Aadhaar Enrolment Centre. This ensures the stored data is current and matches your present physical attributes.
Secure Your Mobile Number
Your registered mobile number is a critical link for Aadhaar authentication, particularly for OTP-based services. Always ensure it’s active and that you have control over it.
If you change your number, update it with UIDAI promptly by visiting an Aadhaar Enrolment Centre. This protects you from potential fraud and ensures OTPs reach you.
Where to Find More Help
When you’ve exhausted your immediate troubleshooting options, knowing where to turn for official assistance is crucial. Relying on verified government channels ensures you receive accurate and secure support. Avoid third-party websites or unofficial helplines, as they may provide incorrect information or compromise your data.
These official resources are equipped to handle your queries and provide the most reliable solutions. You’re not alone in facing these issues, and help is readily available.
- Official UIDAI Website: The primary resource for all Aadhaar-related information, and self-service options. Visit uidai.gov.in.
- Aadhaar Enrolment Centres: For physical updates to biometrics or mobile numbers, these centres provide direct assistance. You can find your nearest centre on the UIDAI website.
- Customer Service Helpline: UIDAI offers a dedicated helpline (1947) for Aadhaar-related queries and assistance. This number is accessible across India and provides support in multiple languages.
Official UIDAI Website
The UIDAI website offers extensive information, including detailed explanations of error codes, guides for updating details, and tools to check your Aadhaar status. It’s your first stop for self-help. You can also download your e-Aadhaar and locate enrolment centres there.
Aadhaar Enrolment Centres
For issues requiring physical presence, such as biometric updates or mobile number changes, Aadhaar Enrolment Centres are indispensable. These centres are equipped with the necessary hardware and staff to process your requests securely. Always book an appointment online if possible to save time.
Customer Service Helpline
If you prefer speaking to someone, the UIDAI helpline (1947) is available throughout the week. They can provide guidance on specific error codes, help you understand processes, and direct you to the right resources. Have your Aadhaar number ready when you call for faster service.
Conclusion
Understanding Aadhaar authentication error codes is not about fixing a problem; it’s about regaining control over your digital life. By deciphering what codes like 401 or 500 mean, you can confidently address demographic mismatches or biometric failures. Taking the proactive step to keep your Aadhaar details updated ensures smoother transactions and avoids future interruptions.
How do I fix an Aadhaar authentication failed error?
What does Aadhaar error code 400 mean, and how can I resolve it?
Can I update my mobile number linked to Aadhaar online?
Why should I keep my Aadhaar details updated, even if I don't use it frequently?
What are the main differences between demographic and biometric Aadhaar authentication errors?
Is it possible for my Aadhaar to be valid but still fail authentication, and why?
What if my registered mobile number is no longer active and I need to update it for Aadhaar OTP?
Which type of Aadhaar authentication error is most difficult to resolve, and what should I do?
Author