How to Use Paytm UPI AutoPay for Online Recharges and Bill Payments

byPaytm Editorial TeamLast Updated: March 16, 2026
UPI Autopay - Paytm

By Q4 2025, the National Payments Corporation of India (NPCI) projects that over 300 million recurring mandates will be active via UPI AutoPay, representing a significant shift towards automated digital payments for essential services. This surge underscores the growing reliance on convenient, scheduled transactions for everything from utility bills to mobile recharges, making financial management simpler for millions across India.

This guide covers the process of setting up and managing UPI AutoPay on Paytm for various online recharges and bill payments. You will learn step-by-step activation, key benefits, common pitfalls, and how to ensure your recurring expenses are handled efficiently and without interruption.

Understanding UPI AutoPay on Paytm

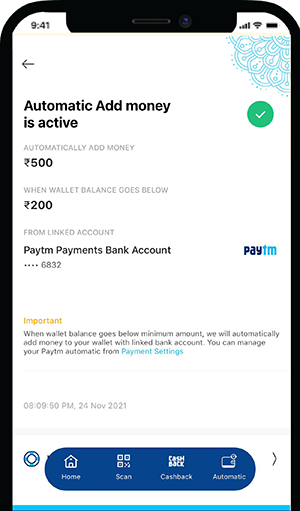
UPI AutoPay on Paytm is a powerful feature designed to simplify your recurring financial commitments. It allows you to set up automatic payments for a wide array of services, including mobile recharges, DTH subscriptions, electricity bills, and piped gas payments, directly from your UPI-linked bank account. Once a mandate is created and approved, Paytm facilitates the deduction of the specified amount on the due date, ensuring your services remain uninterrupted.

This system operates under the robust framework established by the National Payments Corporation of India (NPCI), which governs all UPI transactions. The Reserve Bank of India (RBI) provides the overarching regulatory guidelines, ensuring that all digital payment systems are secure, transparent, and consumer-friendly. This regulatory oversight means you can trust the integrity and safety of your automated payments.

Quick Context: What is NPCI?

NPCI, or the National Payments Corporation of India, is the umbrella organisation for operating retail payments and settlement systems in India. It is an initiative of the Reserve Bank of India (RBI) and Indian Banks’ Association (IBA) under the provisions of the Payment and Settlement Systems Act, 2007, for creating a robust payment and settlement infrastructure in India.

The Core Functionality of AutoPay

The primary function of UPI AutoPay is to eliminate the need for manual intervention in routine payments. Instead of remembering due dates and initiating transactions each month, you grant a one-time authorisation for future debits up to a specified limit and frequency. This mandate then allows your service providers to collect payments automatically, ensuring continuity of service without any effort on your part.

Paytm acts as the facilitator, securely relaying your mandate details to NPCI and your bank. This integration makes managing your finances incredibly convenient, as all your payment activities are consolidated in one place within the app. The system sends timely notifications before each debit, providing you with ample opportunity to review or adjust your mandate if necessary.

Essential Eligibility Checks for UPI AutoPay

Before you can harness the convenience of UPI AutoPay, there are a few fundamental requirements you must meet. Ensuring these checks are in place will prevent any hiccups during the setup process and guarantee smooth, automated transactions. These prerequisites are crucial for the secure and successful operation of any recurring payment mandate.

The #1 eligibility check you must perform is ensuring your bank account has sufficient funds. While this seems obvious, it is the most common reason for failed AutoPay transactions. Always verify your account balance a few days before a scheduled debit to avoid disruptions and potential late fees from service providers.

  • You must possess an active bank account in India.
  • Your bank account needs to be successfully linked to UPI on the Paytm application.
  • You must have a registered and active UPI ID on Paytm.
  • The Paytm application on your device should be updated to its latest version to access all features.
  • You must maintain sufficient funds in your linked bank account to cover the AutoPay mandate.

Common Confusion: The Most Common Mistake

Many users overlook maintaining sufficient balance in their UPI-linked bank account before a scheduled AutoPay debit. This often leads to failed transactions, potential late fees from service providers, and even service disconnections. Always ensure your account has adequate funds a few days before the AutoPay date.

Verifying Your Setup

To confirm your readiness for UPI AutoPay, open your Paytm application and navigate to the UPI section. Here, you should be able to see your linked bank accounts and active UPI IDs. If you have not yet linked a bank account or created a UPI ID, you will need to complete these steps first, which typically involves selecting your bank and verifying your mobile number.

Ensuring your Paytm app is up-to-date is equally important. App updates often include critical security patches and new features, including enhancements to the AutoPay functionality. A quick check on your device’s app store will confirm if you are running the latest version, guaranteeing access to the most secure and efficient payment experience.

Setting Up Your First UPI AutoPay Mandate

Activating UPI AutoPay on Paytm is a straightforward process that grants you greater control over your recurring expenditures. Whether it is for a monthly mobile recharge or a quarterly utility bill, the initial setup follows a general pattern, ensuring consistency and ease of use across different service types. This foundational process involves selecting the service, defining payment parameters, and authorising the mandate.

The Paytm application acts as your primary interface for all these actions. While the underlying technology is governed by NPCI, all your interactions for setting up, modifying, or cancelling mandates happen directly within the secure environment of your Paytm app. This integration makes managing your finances incredibly convenient, as all your payment activities are consolidated in one place.

Pro Tip: Review Before You Authorise

Always double-check the service provider, biller details, payment amount, and frequency before authorising any UPI AutoPay mandate. A small error in setup could lead to incorrect deductions or payments to the wrong entity.

Step-by-Step Activation Process

Follow these steps to set up a new UPI AutoPay mandate on your Paytm app:

Step 1: Open the Paytm application on your smartphone and ensure you are logged in.

Step 2: Tap on your profile icon, typically located at the top-left corner of the home screen, to access your settings.

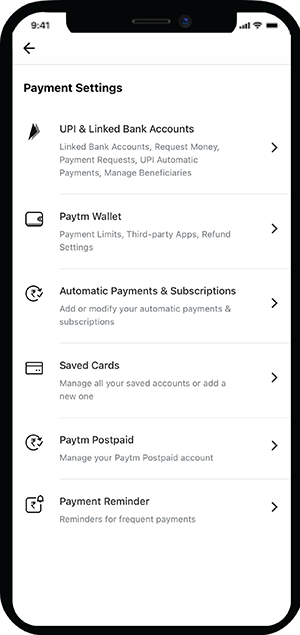
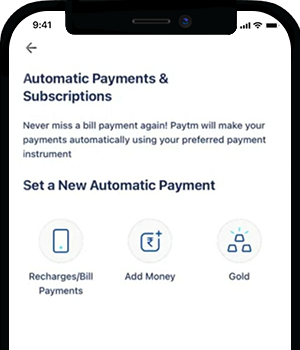
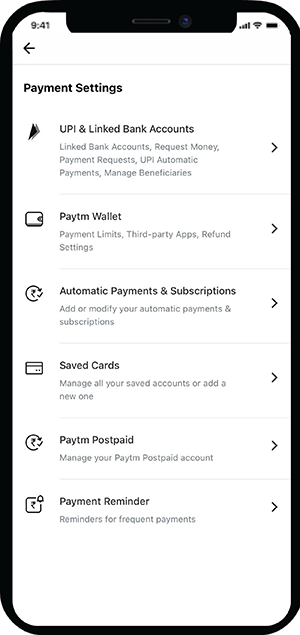
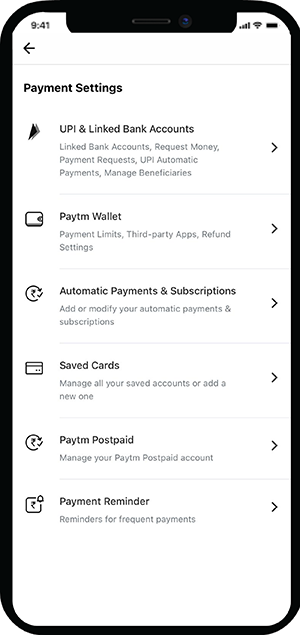
Step 3: Navigate to ‘UPI & Payment Settings’ or a similar section. Scroll down and locate ‘Automatic Payments & Subscriptions’ or ‘UPI AutoPay’.

Step 4: Select ‘Setup New’ or ‘Create New Mandate’ to initiate the process for a new recurring payment.

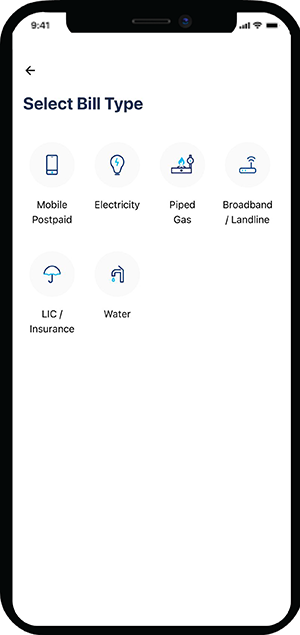
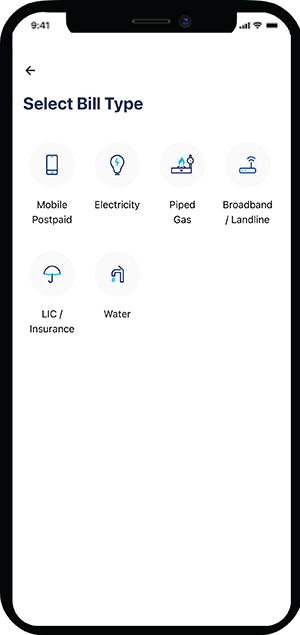
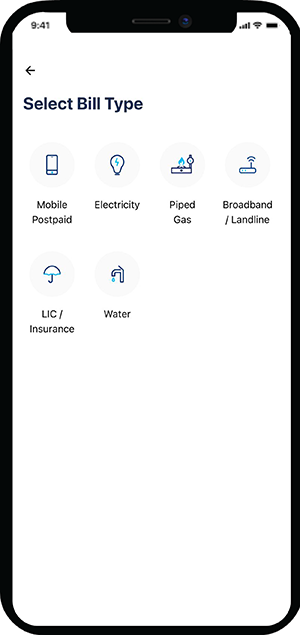
Step 5: Choose the specific service category for which you wish to set up AutoPay, such as ‘Mobile Recharge’, ‘Electricity’, ‘Piped Gas’, or ‘DTH’.

Step 6: Enter the required details for the chosen service. This could include your mobile number, customer ID, or subscriber ID, depending on the service.

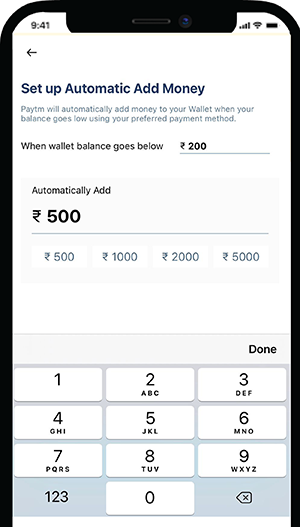
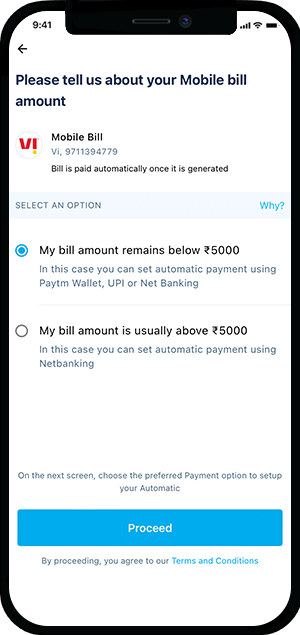
Step 7: Define the payment parameters. This involves setting the payment amount (fixed or variable up to a limit), the frequency (e.g., monthly, quarterly), and the start/end date for the mandate.

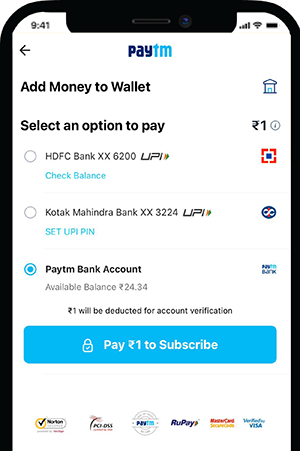
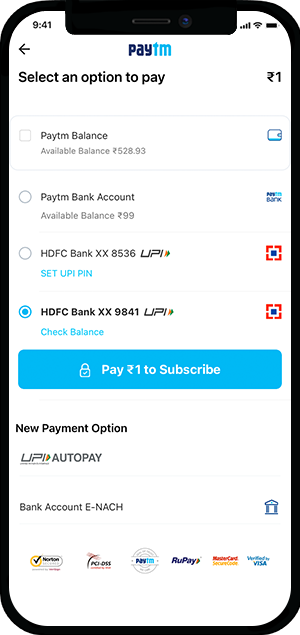
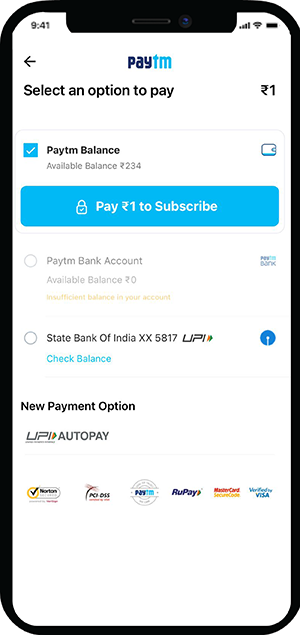
Step 8: Select the UPI-linked bank account from which the payments will be automatically debited.

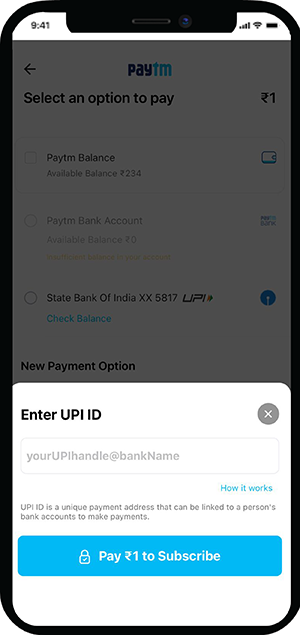
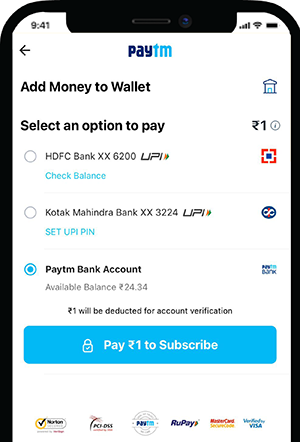
Step 9: Review all the entered details carefully. Once confirmed, you will be prompted to enter your UPI PIN to authorise the AutoPay mandate.

Once your UPI PIN is successfully entered, the AutoPay mandate will be activated. You will receive a confirmation within the app and via SMS, and Paytm will send you timely notifications a few days before each scheduled payment, allowing you to ensure sufficient balance. For example, Jagdish, a logistics manager in Mumbai, recently set up AutoPay for his broadband bill, and he received a confirmation SMS immediately, giving him peace of mind.

Understanding Mandate Parameters

When setting up an AutoPay mandate, carefully consider the payment amount, frequency, and duration. For services like mobile recharges, you might opt for a fixed amount corresponding to a specific plan. However, for utilities like electricity, where the bill amount varies, you can set a maximum limit, ensuring that any bill exceeding this amount requires your explicit approval, adding an extra layer of control.

The frequency can be customised to match your billing cycle, whether it is monthly, quarterly, or even on a specific day of the month. You also have the option to set an end date for the mandate, which is particularly useful for subscriptions or services with a defined tenure. This flexibility ensures that AutoPay aligns perfectly with your individual financial needs.

Managing Automatic Mobile Recharges and DTH Subscriptions

Keeping your mobile and DTH services active is crucial for daily life, and UPI AutoPay simplifies this significantly. Instead of remembering monthly recharge dates or scrambling for payments, you can set up recurring mandates that handle these tasks automatically. This ensures uninterrupted connectivity and entertainment, freeing you from manual interventions and the risk of service disconnection.

The process for setting up these specific recharges is integrated within the general AutoPay framework but requires attention to service-specific details. Whether you are topping up a prepaid mobile plan or paying a postpaid bill, Paytm’s interface guides you through selecting the correct operator and plan details. This seamless integration makes managing multiple mobile and DTH connections effortless.

Setting Up AutoPay for Mobile and DTH

Here are the specific steps for setting up automatic recharges for mobile and DTH services:

Step 1: From the Paytm app’s home screen, go to ‘Automatic Payments & Subscriptions’ via your profile icon and ‘UPI & Payment Settings’.

Step 2: Tap on ‘Setup New’ and then select ‘Mobile Recharge’ or ‘DTH Recharge’ from the list of services.

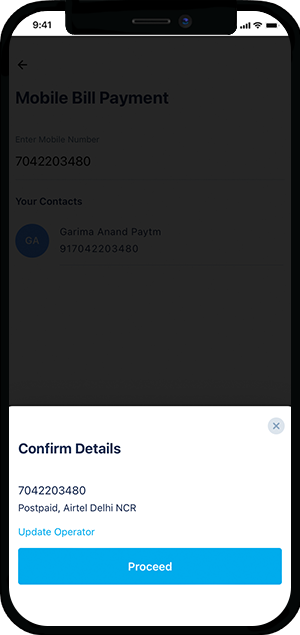
Step 3: For mobile, enter the mobile number. Paytm will typically auto-detect the operator. For DTH, select your operator (e.g., Tata Play, Airtel Digital TV) and enter your subscriber ID.

Step 4: If setting up for a prepaid mobile, choose the specific recharge plan amount and validity. For postpaid or DTH, the system will usually fetch the bill amount or allow you to set a maximum limit.

Step 5: Specify the frequency of the recharge (e.g., monthly, every 28 days) and the start date.

Step 6: Select your preferred UPI-linked bank account for the auto-debits.

Step 7: Review all details and confirm the mandate by entering your UPI PIN.

Customising Your Recharge Mandates

Paytm’s UPI AutoPay offers significant customisation for mobile and DTH recharges. For prepaid mobile users, you can select specific plans, ensuring you always get the desired data and talk time benefits. This avoids the hassle of manual plan selection and ensures your services are always active with your preferred benefits.

For postpaid mobile and DTH, the flexibility to set a maximum payment limit is invaluable. This protects you from unexpectedly high bills while still benefiting from automation. Should a bill exceed your set limit, Paytm will prompt you for an additional authentication, giving you control over larger expenditures.

Automating Utility Bill Payments: Electricity, Gas, and Water

Managing utility bills can be a recurring hassle, with different due dates and varying amounts. UPI AutoPay on Paytm provides a streamlined solution, allowing you to automate payments for essential services like electricity, piped gas, and water. This not only saves time but also helps avoid late payment penalties and service disconnections, ensuring your household runs smoothly.

The key to successfully setting up utility bill AutoPay lies in accurately entering your unique customer identification number, which varies by service and provider. Paytm’s interface is designed to help you locate your specific biller and enter these details correctly, ensuring your payments reach the right account. This precision is vital for avoiding misdirected payments.

Step-by-Step for Electricity Bill AutoPay

Paying your electricity bill automatically ensures constant power supply without manual reminders.

Step 1: Access ‘Automatic Payments & Subscriptions’ within your Paytm app settings.

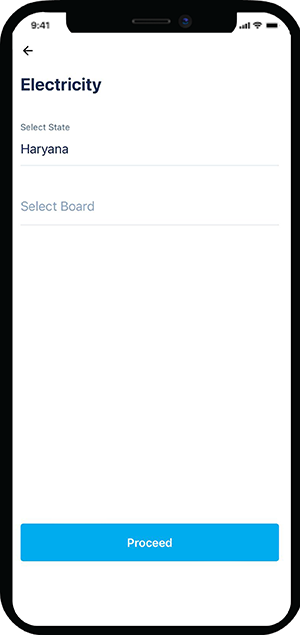
Step 2: Select ‘Setup New’ and then choose ‘Electricity’ from the utility options.

Step 3: Select your state and then your specific electricity board or distribution company from the provided list.

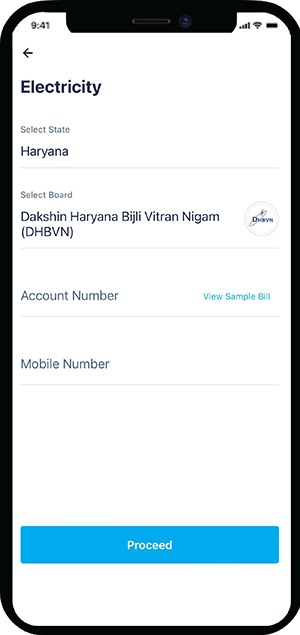
Step 4: Enter your Customer Identification Number (often called CA number, account number, consumer number, or service number) and your registered mobile number. You can usually find this number on a previous electricity bill.

Step 5: The system will fetch your bill details. Review these details carefully.

Step 6: Set the payment frequency (usually monthly) and select the UPI-linked bank account for the debit.

Step 7: Confirm the mandate by entering your UPI PIN.

Setting Up AutoPay for Piped Gas Bills

For those with piped gas connections, automating payments can prevent service interruptions.

Step 1: Navigate to ‘Automatic Payments & Subscriptions’ in your Paytm app.

Step 2: Tap ‘Setup New’ and select ‘Piped Gas’ from the service categories.

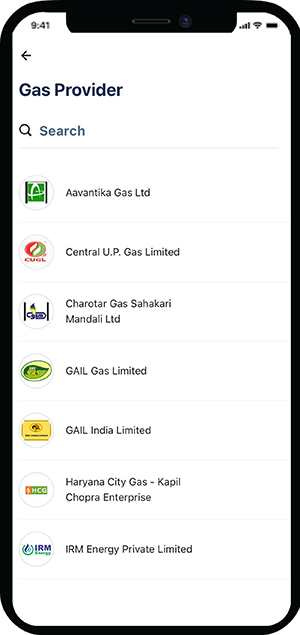
Step 3: Choose your specific gas provider (e.g., Mahanagar Gas, Indraprastha Gas) from the list.

Step 4: Enter your unique Gas Connection ID or Customer Number.

Step 5: Review the fetched bill details.

Step 6: Define the payment frequency and select your UPI-linked bank account.

Step 7: Authorise the mandate by entering your UPI PIN.

Quick Context: Finding Your Customer ID

Your Customer Identification Number (CIN) or Account Number for utilities is unique to your connection and is essential for bill payments. It is prominently displayed on your physical or e-bill. For electricity, it might be a CA number; for gas, an LPG ID or customer number; and for water, a consumer ID. Always refer to a recent bill to ensure accuracy.

Water Bill AutoPay Considerations

While setting up AutoPay for water bills follows a similar process, it is important to note that availability depends on your specific municipal corporation or water board’s integration with the Paytm platform. Always check if your local water provider is listed within the ‘Water’ utility section of the app. If your provider is available, you will typically need your consumer ID or account number to link your bill.

Automating water bill payments is particularly beneficial in areas where bills are generated less frequently, such as quarterly or bi-annually. This prevents you from missing a payment due to a longer interval between bills, ensuring continuous service and avoiding any penalties from the water authority.

Benefits, Limits, and Security of UPI AutoPay

Embracing UPI AutoPay on Paytm brings a multitude of advantages that enhance financial management and convenience. Beyond just automating payments, it offers a secure and controlled environment for all your recurring transactions, ensuring peace of mind for you and other users. Understanding its benefits, along with its operational limits and security features, is key to maximising its utility.

The system is designed with user control at its core. You receive advance notifications, have the flexibility to pause or cancel mandates, and all transactions are secured by your UPI PIN, making it a robust solution for modern digital payments. This blend of convenience and security makes UPI AutoPay an indispensable tool for managing recurring expenses efficiently.

Key Advantages of Using UPI AutoPay

  • Never Miss a Payment: Your bills and recharges are paid automatically on time, helping you avoid late fees, penalties, and service interruptions.
  • Unmatched Convenience: Eliminates the need to remember due dates or manually enter payment details each time, saving valuable time and effort.
  • Full Control and Flexibility: You can select your preferred bank account for debits, set payment amounts (fixed or maximum limits), define frequencies, and pause or resume mandates anytime.
  • Advance Notifications: Paytm sends timely reminders 2-3 days before a scheduled payment, allowing you to ensure sufficient funds or make necessary adjustments.
  • Comprehensive Coverage: Supports a wide range of recurring payments, from mobile recharges and DTH subscriptions to electricity, gas, and water bills, all from a single platform.
  • Enhanced Transparency: All active mandates and payment histories are easily accessible within the Paytm app, providing clear oversight of your spending.

Common Confusion: Misconception about AutoPay Limits

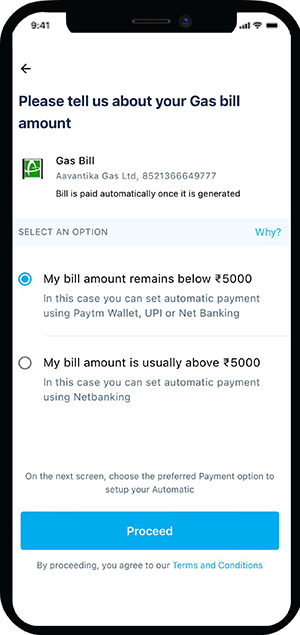
While many recurring payments via UPI AutoPay have a default limit of INR 5,000 per transaction, it’s a misconception that this applies to all. For specific categories like mutual fund investments, insurance premiums, and loan repayments, mandates exceeding INR 5,000 are permissible, requiring an additional factor of authentication during the initial setup.

Transaction Limits and Security Measures

For most consumer-centric recurring payments, such as utility bills and recharges, the UPI AutoPay limit is set at INR 5,000 per transaction by NPCI guidelines. Any mandate exceeding this amount will require an additional authentication factor (like your UPI PIN) for each transaction, even after the initial setup. This dual-layer security ensures that larger payments are always explicitly approved by you, enhancing safety.

The security of UPI AutoPay is paramount. Every mandate creation requires your UPI PIN for authorisation, which is known only to you. Payments are debited directly from your bank account, not a digital wallet, adding an extra layer of banking security. Furthermore, NPCI’s robust infrastructure provides end-to-end encryption for all UPI transactions, safeguarding your financial data against unauthorised access and ensuring compliance with RBI regulations.

Pro Tip: Regularly Review Your Mandates

Make it a habit to review your active UPI AutoPay mandates on Paytm every few months. This ensures that old subscriptions are cancelled, payment frequencies are still relevant, and you are aware of all recurring debits from your account, maintaining complete control over your finances.

Managing and Cancelling Mandates

One of the significant benefits of UPI AutoPay is the ease with which you can manage your mandates. Within the ‘Automatic Payments & Subscriptions’ section of your Paytm app, you can view all your active mandates, their upcoming payment dates, and the associated details. This central dashboard provides complete transparency over your automated payments.

If your circumstances change, or you no longer require a particular service, you can easily pause or cancel an active mandate at any time directly from the app. This flexibility ensures that you retain full control over your recurring expenses, preventing unwanted deductions and allowing you to adapt your payment schedule as needed. The cancellation process is immediate and requires your UPI PIN for authentication, ensuring security.

Conclusion

Setting up automatic payments for your utility bills and mobile recharges on Paytm using UPI AutoPay takes under two minutes and ensures you never miss a renewal or due date. With UPI AutoPay, your mandates stay transparent, secure, and cancellable at any time, offering unparalleled convenience and control over your recurring expenses. By embracing this feature, you can significantly streamline your financial management and avoid unnecessary late fees or service interruptions, ensuring peace of mind.

FAQs

How do I set up AutoPay for my utility bills like electricity or piped gas on Paytm?

Setting up AutoPay for utility bills on Paytm is straightforward. First, open the Paytm app, go to your profile icon, then 'UPI & Payment Settings', and select 'Automatic Payments & Subscriptions'. Choose 'Setup New' and then your specific utility (e.g., 'Electricity' or 'Piped Gas'). You'll need to select your state/provider and enter your unique Customer Identification Number (like a CA number for electricity or connection ID for gas), found on a previous bill. Review the fetched bill details, set the payment frequency, select your linked bank account, and confirm with your UPI PIN. For example, a resident in Bengaluru can automate their BESCOM electricity bill this way.

Can I use AutoPay on Paytm if my bank account is not linked to UPI?

No, you cannot use AutoPay on Paytm without a bank account successfully linked to UPI. AutoPay mandates are processed directly from your UPI-linked bank account, not a digital wallet. To use this feature, you must have an active bank account in India, and it needs to be linked to UPI on your Paytm application with a registered UPI ID. Ensure your Paytm app is updated to its latest version. If your account isn't linked, you'll need to complete this initial setup by selecting your bank and verifying your mobile number within the app.

How can I view or cancel an active AutoPay mandate on Paytm?

Yes, you can easily view, pause, or cancel your active AutoPay mandates on Paytm at any time. To do this, open the Paytm app, navigate to your profile icon, then 'UPI & Payment Settings', and select 'Automatic Payments & Subscriptions'. Here, you will find a central dashboard listing all your active mandates, their upcoming payment dates, and associated details. To cancel a mandate, select it and follow the prompts, which will typically require your UPI PIN for authentication. This flexibility ensures you retain full control over your recurring expenses, preventing unwanted deductions.

What are the main benefits of using AutoPay on Paytm compared to manual bill payments?

AutoPay on Paytm offers significant advantages over manual bill payments. Firstly, it ensures you never miss a payment, avoiding late fees, penalties, and service interruptions for crucial services like mobile recharges or electricity bills. Secondly, it provides unmatched convenience by eliminating the need to remember due dates or manually enter payment details each month, saving valuable time. You also get full control, with options to set payment limits, frequencies, and receive advance notifications. For instance, a small business owner in Chennai can automate their monthly broadband bill, freeing up time to focus on their business.

What are the transaction limits for AutoPay mandates on Paytm, and how secure are these payments?

For most consumer recurring payments like utility bills and recharges, the AutoPay limit is INR 5,000 per transaction, as per NPCI guidelines. However, for specific categories such as mutual fund investments or loan repayments, mandates exceeding INR 5,000 are permissible but require an additional authentication factor (like your UPI PIN) for each transaction after the initial setup. Security is paramount; every mandate creation requires your UPI PIN, and payments are debited directly from your bank account, not a digital wallet. NPCI's robust infrastructure ensures end-to-end encryption for all transactions, safeguarding your financial data.

Why might an AutoPay transaction fail, even if I have sufficient balance in my bank account?

An AutoPay transaction can fail despite sufficient balance due to several reasons beyond just low funds. Common issues include temporary downtime or maintenance on your bank's server or the service provider's system, incorrect mandate parameters (e.g., wrong customer ID entered during setup), exceeding a daily transaction limit if applicable to your bank, or poor internet connectivity during the processing window. Always ensure your Paytm app is updated. If a transaction fails, check your bank's service status, verify mandate details in the app, and try again after some time.

What happens if my bank account has insufficient funds when an AutoPay payment is scheduled on Paytm?

If your linked bank account has insufficient funds when an AutoPay payment is scheduled, the transaction will fail. Paytm will typically send you timely notifications 2-3 days before a scheduled debit, giving you an opportunity to ensure sufficient balance. If the payment still fails due to low funds, you may incur late fees or penalties from your service provider (e.g., electricity board, mobile operator) and risk service disconnection. It's crucial to regularly review your account balance or set up low-balance alerts with your bank to avoid such disruptions.

What should I do if my AutoPay mandate on Paytm is incorrectly deducting money or failing to process?

If your AutoPay mandate is deducting incorrect amounts or consistently failing, first, review the mandate details within the 'Automatic Payments & Subscriptions' section of your Paytm app. Check the service provider, biller details, payment amount (fixed or maximum limit), and frequency to ensure they match your expectations. If a deduction is incorrect, immediately pause or cancel the mandate in the app and contact the service provider directly to resolve the overcharge. For consistent failures, verify your bank account details, sufficient funds, and ensure your app is updated. If issues persist, contact your bank's customer care for assistance.
something

You May Also Like